Cheap resistance bands: hidden costs and safety risks
Cheap resistance bands fail at the point where users usually apply the highest load: near full elongation, with the band under tension and the body positioned in its return path. The failure is not a minor equipment defect.
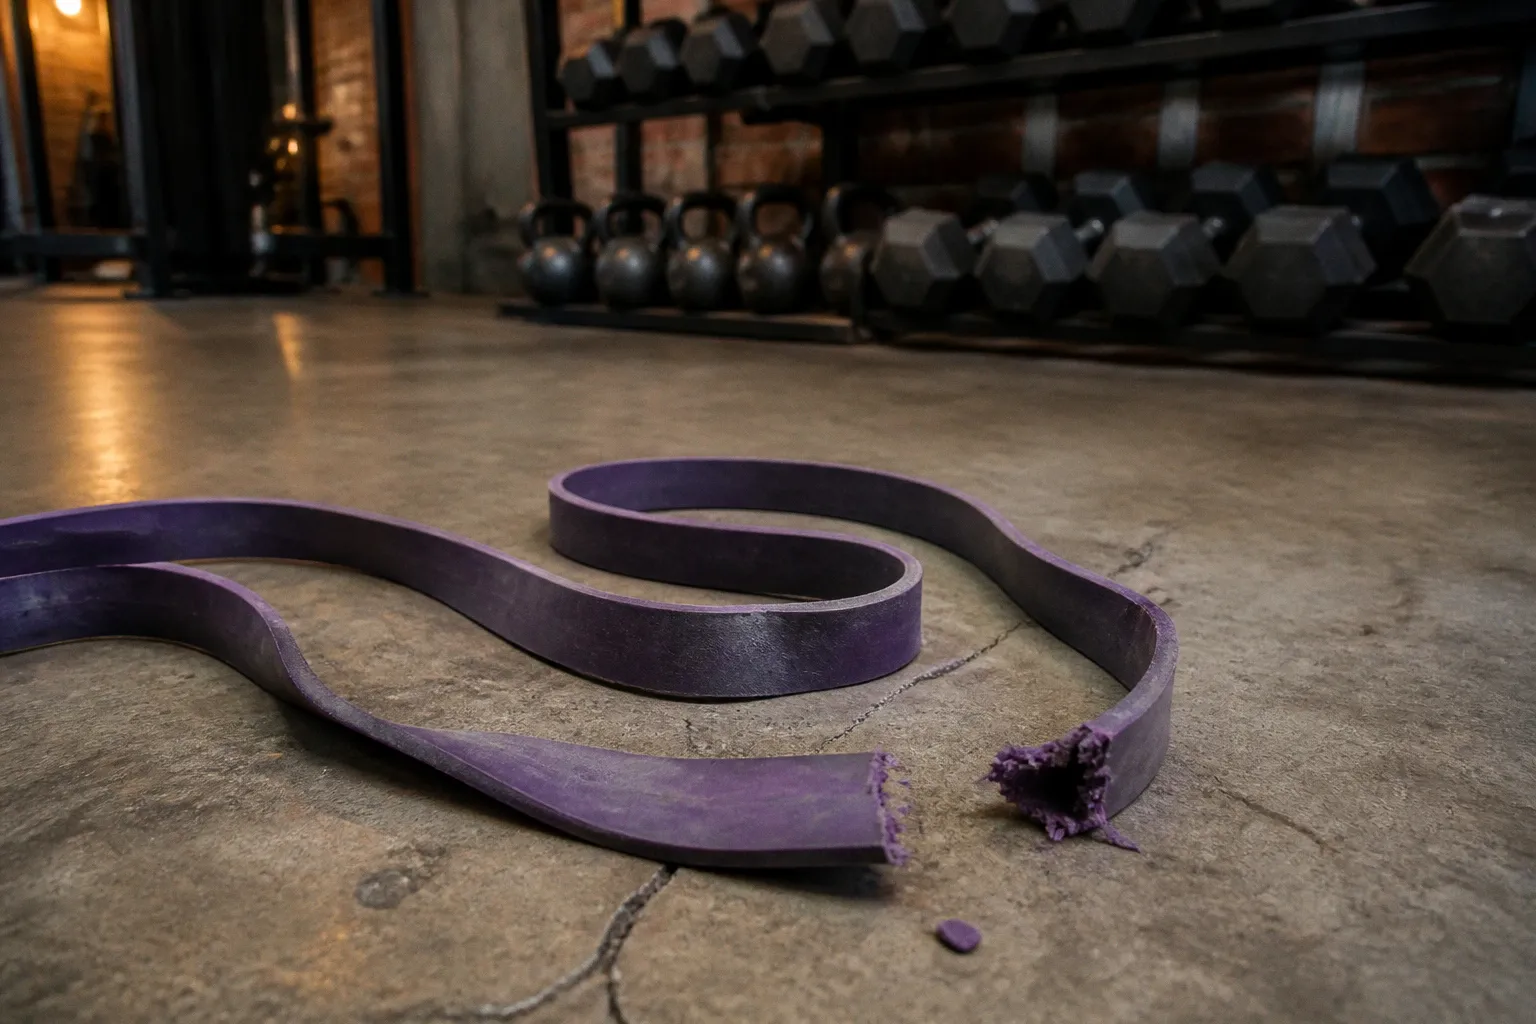
Elastic potential energy is released in milliseconds. The band becomes a whip.
The main risks are mechanical: sudden snapback, facial trauma, ocular injury, joint displacement, and anchor or carabiner failure. Material quality determines how quickly those risks accumulate. Storage and setup determine whether the failure reaches the user.
Price is not a sufficient quality metric. A low-cost band may produce usable resistance for several sessions. It may also use single-layer TPE, low-grade latex, an under-rated carabiner, and an unpadded door anchor that cuts into the band during every repetition. The initial saving then becomes a replacement cycle with a larger injury exposure.
The material determines the failure mode
Resistance bands are not passive accessories. They are elastic structures that store energy as they elongate. Their mechanical behavior depends on polymer composition, layer construction, cross-sectional integrity, age, and exposure.
Low-cost bands commonly use molded single-layer thermoplastic elastomer, or TPE, and low-grade latex. These materials are not automatically unusable. TPE can be appropriate for short-term training and for users with latex allergies. The issue is degradation and failure tolerance.
A single-layer band has less structural redundancy. A surface defect can propagate through the same material layer that carries the entire load. Multi-layer natural latex distributes stress across continuous dipped layers. Premium products may contain more than 15 layers. That does not make them immune to snapping. It gives the structure more resistance to crack propagation and fatigue.
The difference appears during repeated elongation:
- Single-layer construction loses elasticity faster when oxidation and micro-cracking begin.
- Multi-layer latex maintains a more stable force profile over a longer service period when stored correctly.
- Low-grade compounds can become brittle, tacky, or visibly dry before the user identifies a critical defect.
- A cut, puncture, or edge tear reduces the effective cross-section and concentrates stress at one point.
- Repeated stretching near the material limit increases fatigue even when the band looks intact.
The relevant question is not whether the band worked during the first workout. It is whether the material retains its original mechanical behavior after hundreds or thousands of loading cycles.
A band does not need to look broken to be mechanically compromised. Micro-cracking is a failure process, not a cosmetic condition.
Cheap vs expensive resistance bands
The price difference usually reflects construction, not branding alone. Compare the parts that carry load.
| Parameter | Cheap resistance bands | Higher-quality resistance bands |
|---|---|---|
| Band construction | Often single-layer TPE or low-grade latex | Frequently multi-layer natural latex |
| Elasticity retention | Degrades faster with use and environmental exposure | More stable when maintained and stored correctly |
| Typical service life | Often around 6–12 months in demanding use | Commonly 2–5 years, depending on load and care |
| Carabiners | Included hardware may be rated around 0.5–3 kN | Better systems may use hardware in the 8–12 kN range |
| Door anchors | Often unpadded, with edges that abrade the band | More likely to use protective padding and controlled contact surfaces |
| Failure tolerance | Low redundancy and rapid crack propagation | Greater structural redundancy, but still vulnerable to damage |
| Replacement economics | Lower entry price, frequent replacement | Higher entry price, longer replacement interval |
These ranges do not represent a universal certification standard. Generic kits vary. The figures describe the gap commonly found between low-grade included components and substantially stronger hardware.
A strong carabiner also does not make a poor band safe. The weakest component defines the system. A durable latex tube connected to a sharp door anchor remains a compromised setup.
Anatomy of a snap: why the return path matters
When a band is stretched, it stores elastic potential energy. The energy increases as the band elongates and the applied force rises. Near the upper end of the usable range, a small additional change in length can create a disproportionate increase in internal stress.
A practical upper boundary is approximately 2.5 to 3 times the band’s resting length. Beyond this range, the probability of sudden mechanical failure rises sharply. Treat this as a maximum elongation limit, not a target for normal repetitions.
If the band breaks at full elongation, both ends accelerate toward their attachment points. The free section can recoil across the movement path. The result is a whip-like release with enough velocity to cause:
- Blunt facial trauma.
- Periorbital bruising and black eyes.
- Corneal injury.
- Retinal damage, including retinal detachment.
- Lacerations from damaged clips or exposed hardware.
- Reflexive joint movement that produces sprains or loss of control.
Ocular injury has a specific risk profile. The eye cannot tolerate the same impact that a large muscle group can absorb. A user may have a minor bruise and a serious internal eye injury from the same event. Pain intensity is not a reliable severity test.
Any sudden impact to the eye followed by blurred vision, flashes, floaters, a curtain-like visual obstruction, bleeding, or persistent pain requires urgent medical assessment. Do not resume training because the external swelling appears limited. The relevant tissue is not always visible.
Force is not distributed evenly
Band resistance is not constant through the range of motion. A band produces less tension near its resting length and more tension as it elongates. This changes the joint torque during the exercise.
Torque is the product of force and moment arm. If the band force rises while the line of pull also increases the external moment at the shoulder, elbow, knee, or hip, the joint experiences a higher demand near end-range. This is why a band can feel manageable during the first half of a repetition and become mechanically aggressive in the final portion.
The risk increases when the user combines:
- High band tension.
- Long elongation.
- A fixed anchor.
- A fast eccentric return.
- A joint near end-range.
- The face or torso positioned inside the recoil path.
The setup is therefore part of the exercise prescription. “Use control” is not a sufficient instruction. The line of force, anchor integrity, stretch ratio, and body position need to be controlled.
Hardware hazards are not secondary
Many resistance-band kits fail at the hardware before the band itself fails. The included carabiners can be the weakest link. Budget kits often use low-grade metal clips with ratings around 0.5 to 3 kN. Climbing-grade hardware is commonly rated around 8 to 12 kN, although the rating depends on the equipment design, loading direction, gate condition, and certification.
Do not interpret those numbers as a direct promise of safety. A carabiner loaded across the gate, twisted against a ring, or exposed to shock loading does not behave like a carabiner loaded along its major axis. Ratings apply to defined loading conditions. Resistance-band kits rarely provide the same level of documentation or system testing.
The most common hardware problems are mechanical and visible:
- The carabiner gate does not close fully.
- The clip twists under load.
- The attachment ring contacts the gate instead of the spine.
- The metal is thin, deformed, or visibly corroded.
- The stitching at the band sleeve is loose.
- The handle rotates and forces the connector sideways.
- The door anchor has a narrow edge that compresses or cuts the band.
The door anchor can act like a blade
An unpadded door anchor is not neutral. Under tension, the band presses against the anchor’s edge. Each repetition creates localized compression and abrasion. If the edge is sharp, the band can develop a cut that grows under load.
The door itself also introduces a direction problem. A door anchor may hold under a closing force and fail under an opening force. If the door opens toward the user, the anchor can release and send the band toward the body. If the latch is weak or the door is not fully engaged, the nominal anchor rating is irrelevant.
Before using a door anchor, identify:
- The direction in which the door is loaded.
- Whether the door is fully closed and latched.
- Whether the hinges and frame can tolerate repeated force.
- Whether the anchor edge contacts the band.
- Whether the band can pass through the anchor without twisting.
- Whether the user’s head and torso remain outside the direct recoil path.
A door anchor is a positioning device, not a guarantee of structural integrity. It transfers force to the door and frame. The building hardware becomes part of the resistance system.
The weakest component is not always the band. In many budget kits, the failure begins at the connector, sleeve, or anchor interface.
Resistance band durability depends on exposure
Latex and TPE degrade through chemical and thermal exposure. Ultraviolet radiation, direct sunlight, heat, sweat, soap residue, and repeated wet-dry cycles accelerate surface deterioration. Non-UV-stabilized rubber is particularly vulnerable to micro-cracking and dry rot.
The damage is cumulative. A band stored beside a sunny window may experience more degradation than a band used at the same frequency in a dark, temperature-stable room. A travel kit left in a hot vehicle is exposed to a different degradation rate than one stored in a ventilated cabinet.
The maintenance protocol is simple:
- Keep bands away from direct sunlight and ultraviolet exposure.
- Do not store them in a hot car, on a radiator, or beside a heat source.
- Remove sweat and residue with a damp cloth.
- Avoid solvents, oils, and aggressive detergents unless the manufacturer explicitly permits them.
- Allow the band to dry before storage.
- Store it without tight knots, sharp folds, or compression under heavy objects.
- Keep the band away from abrasive surfaces and metal edges.
- Inspect it before every high-tension session.
Do not use talc, oil, or unapproved lubricant to mask surface changes. A slippery surface can alter grip and handling while concealing the underlying deterioration.
Inspection is a load-management decision
Visual inspection is not a ritual. It determines whether the next loading cycle is justified.
Run the band through the hands while examining both sides. Look for:
- Longitudinal cracks.
- Transverse cuts.
- Whitening or opaque stress lines.
- Blisters, bubbles, or areas of delamination.
- Sticky or unusually dry sections.
- Permanent narrowing.
- Surface roughness.
- Uneven thickness.
- Damage near sleeves, handles, rings, and anchor contact points.
Then perform a low-tension test away from the face. Extend the band gradually and observe whether the width changes evenly. A damaged section may narrow sharply or form a visible weak point.
Do not stretch a suspect band “to see what happens.” That converts inspection into a failure test. If the surface has a cut, deep crack, abnormal thinning, or damaged attachment stitching, retire the band.
There is no reliable home method for proving that an aged band can safely tolerate maximum elongation. Replacement is the correct control measure.
The false economy of budget equipment
The arithmetic of cheap resistance bands is often presented as a purchase-price comparison. That is incomplete. The real cost includes replacement frequency, accessory failure, interrupted training, and injury exposure.
Low-grade TPE bands may require replacement after approximately 6 to 12 months, particularly when used frequently or exposed to heat, sweat, sunlight, and high elongation. Better-constructed natural-latex bands may last around 2 to 5 years under appropriate care. Neither interval is guaranteed. Load, storage, cleaning, and damage determine the actual service life.
A simple comparison is more useful than a slogan:
1. Entry cost: What is the price of the complete kit, including handles, anchors, and clips?
2. Component life: Which part is likely to fail first?
3. Replacement availability: Can the damaged band or connector be replaced separately?
4. Load range: Does the kit require extreme elongation to produce the intended resistance?
5. Maintenance burden: Will the material be exposed to sunlight, heat, sweat, or travel abrasion?
6. Failure consequence: If the component fails, where will the band recoil?
A very light band used for mobility work has a different risk profile from a heavy band used for resisted presses, rows, squats, or assisted pull-ups. The same product can be adequate for one application and poorly suited to another.
Where budget bands remain useful
Cheap resistance bands are not categorically non-functional. They can serve short-term or low-load applications when the user understands the limits.
Reasonable uses include:
- Low-tension activation drills.
- Controlled mobility work.
- Short-term travel workouts.
- Light rehabilitation exercises prescribed within an appropriate range.
- Latex-free training where TPE is selected for allergy management.
- Exercises that do not place the band near the face or under extreme elongation.
The risk profile changes when the band is used for maximal assistance, explosive movement, high-tension anchoring, or exercises where a recoil line crosses the head. A product that is acceptable for lateral steps is not automatically acceptable for assisted pull-ups.
How to reduce the risk of a resistance band snap
“Preventing resistance band snaps” requires mechanical controls. Do not rely on attention alone.
1. Control the stretch ratio
Measure the resting length from the actual load-bearing points, not from the packaging specification. Keep normal training below the upper limit. Do not use 2.5 to 3 times elongation as a standard working range.
If the exercise requires more length than the band can tolerate, change the setup:
- Use a lower-resistance band.
- Move closer to the anchor.
- Shorten the range of motion.
- Select a longer band.
- Reduce the external load.
- Replace a fixed anchor with a safer arrangement.
Increasing elongation to compensate for insufficient resistance is a poor substitution for proper load selection.
2. Keep the recoil path away from the head
Do not position the eyes, mouth, or neck in line with a stretched band. This applies to both ends of the band. If an anchor fails, the band may not follow the path predicted by the exercise diagram.
For pressing and rowing movements, place the body so a failure sends the band away from the face. For assisted pull-ups, inspect the band and attachment point before every set. Do not wrap a damaged band around a pull-up bar and assume the bar protects the user.
3. Eliminate sharp contact surfaces
Every contact point should be rounded, padded, and stable. The band should not rub against a door edge, metal corner, rough flooring, or a ring that pinches the material.
A sleeve can reduce abrasion but cannot correct a sharp or badly positioned anchor. If the band is being compressed into a cutting edge, change the anchor system.
4. Load connectors along their intended axis
Carabiners and rings should remain aligned. Avoid side loading, gate loading, and twisted connections. The band should pull through the spine of the connector rather than levering against the gate.
Check the gate after attaching the band. A connector that appears closed but is held partially open by the attachment ring is not secure.
5. Use slower eccentric control
The return phase is not passive. A rapid return increases velocity and can increase shock loading at the attachment points. Maintain control through the eccentric phase. Do not allow the band to recoil freely.
This does not make a damaged band safe. It reduces unnecessary dynamic loading in a system that has already passed inspection.
A practical comparison by training task
Selecting a band requires matching construction and setup to the task. Use the following as a route through the options rather than as a brand ranking.
| Training task | Lower-risk configuration | Configuration that raises risk |
|---|---|---|
| Lateral walks | Light loop band around the thighs or ankles, no extreme elongation | Thin band with cracks stretched aggressively across a wide stance |
| Rows | Stable anchor behind the torso, moderate stretch, clear recoil path | Unpadded door anchor with the band rubbing on the frame |
| Presses | Anchor positioned away from the face, controlled return | High-tension band aligned toward the eyes |
| Assisted pull-ups | Intact long band, verified bar and attachment, no damaged loop | Aged band under high elongation with body weight added |
| Mobility drills | Low tension, short range, no sharp edges | High tension used to force end-range joint motion |
| Travel training | Compact, inspected band stored away from heat and sunlight | Band left compressed in a hot vehicle or exposed to sand and abrasion |
The best budget resistance bands for safety are not defined by the lowest price. They are the least compromised system within the available budget: intact material, documented or credible construction, functional connectors, protected anchors, and a use case that does not require extreme stretch.
The strict implementation protocol
Apply this protocol before using any resistance band under meaningful tension.
Before the session
- Inspect the entire band under good light.
- Reject any band with cuts, deep cracks, abnormal thinning, stickiness, dry rot, or damaged stitching.
- Inspect handles, sleeves, rings, carabiners, and door anchors.
- Confirm that each carabiner closes fully.
- Confirm that the anchor surface is padded or rounded.
- Measure the available setup and estimate the required stretch.
- Remove the head and eyes from the direct recoil path.
- Confirm that the door, frame, bar, or other anchor is structurally secure.
During the set
- Start with low tension.
- Increase elongation gradually.
- Keep the band aligned with the intended line of force.
- Avoid side loading at connectors.
- Maintain control during the eccentric phase.
- Stop if the band changes width, twists, slips, makes a tearing sound, or develops a new surface defect.
- Do not continue a set because the equipment has “only one more repetition.”
After the session
- Wipe away sweat and residue with a damp cloth.
- Dry the band fully.
- Store it away from sunlight, heat, sharp objects, and heavy compression.
- Record the first appearance of any defect.
- Retire the component if the defect affects the load-bearing section or attachment point.
If a band snaps, do not reuse it after trimming the damaged end. The failure may have initiated away from the visible break. Replace the band and inspect every connector and anchor that experienced the load.
Final position
Cheap resistance bands safety risks are not caused by low price in isolation. They arise from a predictable combination: weak material, limited structural redundancy, inferior hardware, sharp anchor interfaces, excessive elongation, and poor storage.
TPE bands still have a role. Budget equipment can support low-tension training and short-term travel use. But the operating limits must remain narrow. High-tension work requires better construction and a controlled attachment system. Multi-layer latex can provide longer resistance band durability, but it still requires inspection and correct storage.
Treat the band as a loaded mechanical component. Respect the stretch limit. Keep the recoil path away from the eyes. Reject damaged material. Replace the weakest part of the system before it becomes the failure point. That is the complete protocol.