Travel workout gear: four setups for fitness on the road
Travel has a way of shrinking your fitness routine before you even leave home. The hotel gym may be closed, crowded, or equipped with little more than a treadmill and a few mismatched dumbbells. Your suitcase is already full. Your schedule is unpredictable.
By day three, the plan to “train when there’s time” has quietly become a plan to start again at home.
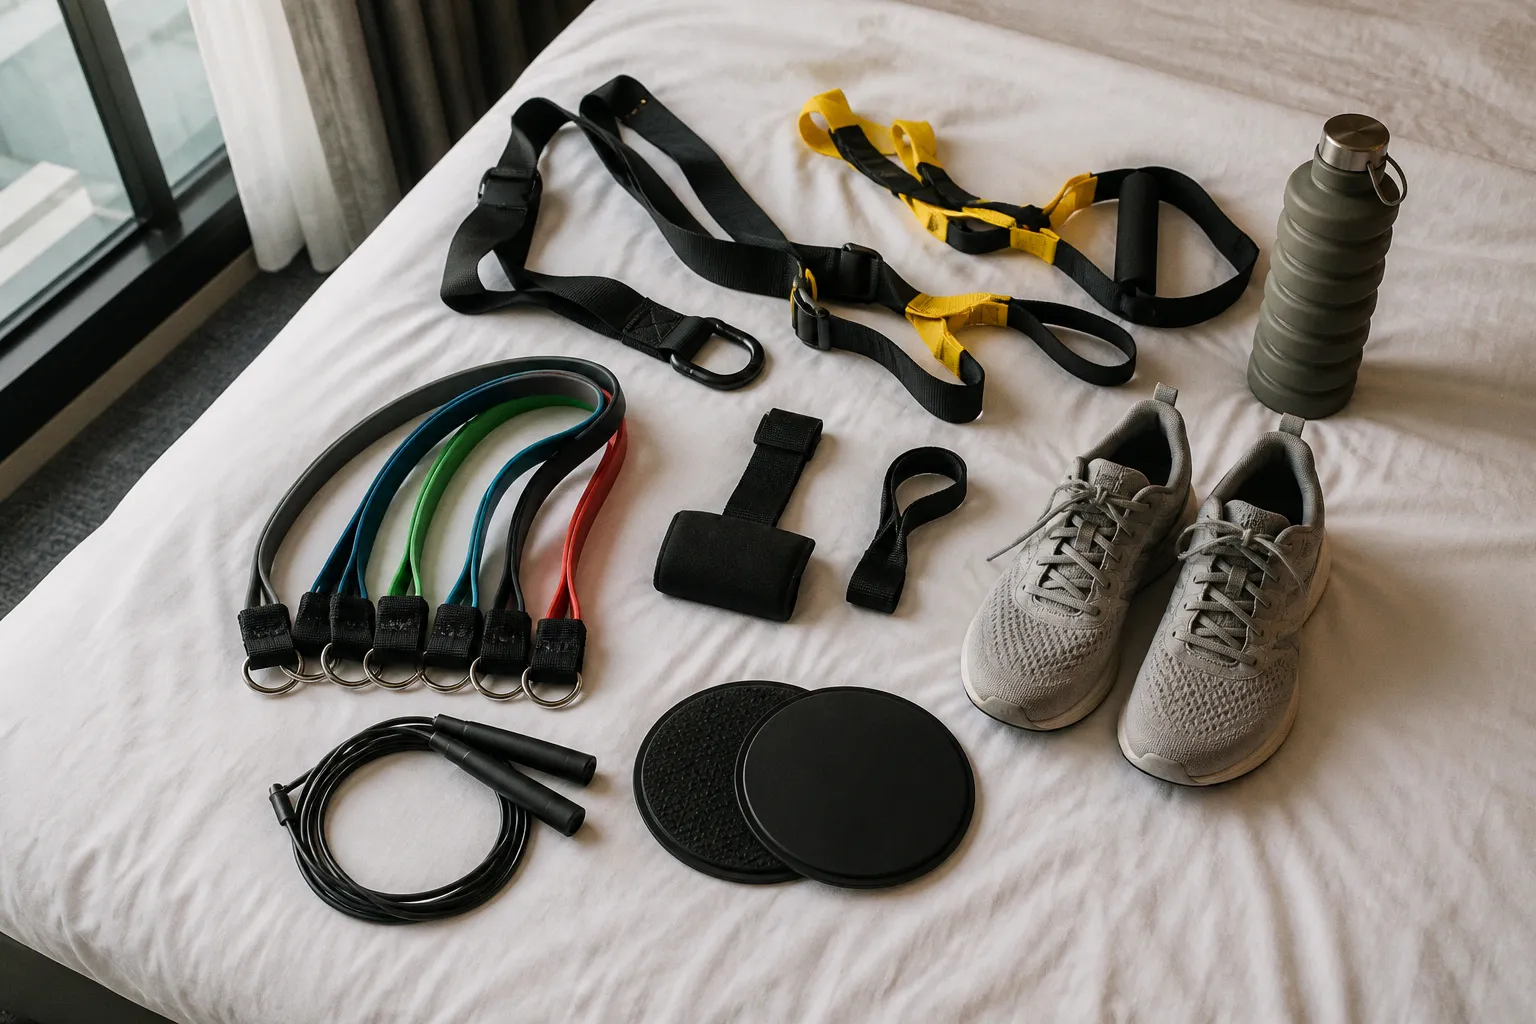
The answer is not packing an entire gym. It is choosing portable travel workout equipment options that match the kind of training you can realistically repeat on the road. A small resistance-band setup, a suspension trainer, a jump rope with sliders, and a compact all-in-one system each solve a different travel problem. The best choice depends less on the number of exercises promised on the package and more on how much space, setup time, and decision-making your routine can tolerate.
Here is the practical comparison: four travel workout gear setups, what each one does well, where it falls short, and how to use it without turning a hotel room into a physics experiment.
| Setup | Best for | Approximate pack burden | Main strength | Main limitation |
|---|---|---|---|---|
| Resistance loop bands | Full-body strength with minimal luggage | A few ounces to under 10 lb with bands and anchors | Easy to scale, versatile, compact | Resistance depends on band length, leverage, and control |
| Suspension trainer | Bodyweight strength and movement variety | Lightweight, but requires a stable anchor point | Excellent full-body exercise range | Door and anchor safety must be assessed every time |
| Speed rope and core sliders | Conditioning, core work, and small spaces | About 0.39 lb for the rope; about 0.5 lb for sliders | Extremely light and inexpensive | Higher impact and less suitable for every room or every body |
| Portable all-in-one gym | One-piece strength solution | Around 6 lb for compact systems | More exercise versatility in one kit | Heavier, bulkier, and usually more expensive than simple tools |
The right travel setup starts with friction, not ambition
Before choosing the best travel exercise gear, decide what normally breaks your routine. If the problem is that you do not have enough resistance for strength work, bands or a portable gym will serve you better than a jump rope. If the problem is limited floor space, suspension training may be more useful than sliders. If you have ten minutes between meetings and need a fast energy shift, a speed rope may be the tool you actually use.
This sounds simple, but it is where many travel kits go wrong. People pack equipment for an imaginary version of themselves: highly motivated, well-rested, and blessed with a two-hour gap between breakfast and dinner. Sustainable training is built for the real version of you, including the delayed flight, the early conference call, and the dinner that runs late.
A useful travel kit should answer three questions:
- Can you set it up without a long learning curve?
- Can you create a worthwhile session with the space available?
- Will you still want to carry it after the first day?
The answer does not need to be yes for every possible workout. It needs to be yes often enough to protect your training momentum.
The most effective piece of travel workout gear is the one that lowers the number of excuses between your schedule and your first set.
1. Minimalist resistance bands: the most adaptable strength option
Resistance bands are often the best starting point for portable fitness equipment because they create training variety without requiring much luggage space. A set of three or four bands with anchors can weigh under 10 pounds and may weigh only a few ounces depending on the design. That gives you a way to train pushing, pulling, hinging, squatting, and core movements without packing metal plates or relying on a hotel facility.
Their resistance works differently from a dumbbell. A band becomes more difficult as it stretches, which means the challenge increases toward the end of the movement. In a chest press, for example, the final portion of the press can feel more demanding than the first few inches. In a row, the band may become most challenging as your hands approach your torso.
That variable resistance is useful, but it changes how you program the exercise. You may not feel the same load at the bottom of a squat that you feel near the top. A band also does not provide an identical tension profile to a heavy barbell. If you want a strength stimulus, you will need to adjust leverage, tempo, range of motion, repetitions, or the number of bands rather than assuming that a colored band directly equals a specific dumbbell weight.
How to build a band setup that travels well
A practical band kit usually includes loop bands or tube bands, handles, and at least one type of anchor. A door anchor can expand your options for rows, presses, pulldowns, and rotational exercises. Without an anchor, you can still perform movements such as squats, split squats, deadlift patterns, presses, lateral walks, and resisted carries, but the upper-body menu becomes narrower.
Pack the smallest setup that supports your actual training priorities:
- For lower-body work, a short loop band can add tension to squats, hip hinges, lateral steps, and glute-focused movements.
- For upper-body pulling, a tube band with handles or a secure anchor creates more options than a mini loop alone.
- For travel circuits, two moderate bands may be more useful than a large collection of very light and very heavy options.
- For progression, change the band, your stance, the band length, or your tempo. Do not rely on color labels alone, because color coding varies by manufacturer.
Band training rewards control. The movement can become easier if you rush through the stretched portion or allow the band to snap back. Keep the return phase deliberate, especially when the band is anchored at a door or around a fixed object.
Where bands fit into a hotel-room session
A full-body band session can be organized around five movement patterns:
1. Squat or split squat: Stand on the band or use a loop above the knees. Add a slow lowering phase if the resistance feels light.
2. Hinge: Anchor the band low or stand on it for a Romanian deadlift pattern. Keep the spine steady while the hips move back.
3. Push: Use a chest press anchor or perform an overhead press from a stable standing position.
4. Pull: Choose a row or pulldown variation that keeps the anchor secure and the band path clear.
5. Core or carry: Use an anti-rotation press, suitcase hold, or slow marching pattern.
You do not need to chase exhaustion in every set. Three controlled rounds with consistent technique can be enough to maintain a sense of strength and structure during a busy trip. The goal is not to recreate your complete home program with less equipment. The goal is to preserve the training behaviors that make returning to your normal routine easier.
2. Suspension training: more leverage, more responsibility
Suspension trainers such as the TRX Home Suspension Trainer use durable nylon webbing, locking adjusters, and a door anchor for hotel-room mounting. The system also includes a carabiner tested at a 1,300-pound capacity. That figure describes the tested capacity of the carabiner, not a universal guarantee that every door, frame, anchor point, or setup can safely support your bodyweight.
This distinction matters. A suspension trainer transfers force into the anchor point, and the quality of that anchor point is part of the equipment system. A strong carabiner does not make an unstable door frame safe.
Why suspension training is useful on the road
The main advantage is leverage. By changing your body angle, foot position, or distance from the anchor, you can make a movement more or less challenging without changing plates or bands. A row can become harder as your body becomes more horizontal. A squat variation can become more accessible when you use the handles for assistance. A plank or pike can add a demanding stability component without needing a large floor area.
A suspension setup can cover:
- Rows and assisted pulling patterns
- Chest presses and push-up variations
- Split squats and assisted single-leg work
- Hamstring curls
- Planks, mountain climbers, and knee tucks
- Mobility-focused support positions
It is particularly helpful when you want a full-body session that feels more like resistance training than a simple conditioning circuit. It also allows you to adjust intensity in small steps, which is valuable when sleep, travel fatigue, or unfamiliar flooring changes how your body feels.
The door-anchor safety check
Hotel doors are not standardized. We cannot assume that every door frame has the same construction, hinge placement, clearance, or stability. Before loading a suspension trainer:
- Read the equipment instructions and use the anchor exactly as designed.
- Check that the door closes fully and that the anchor sits in the intended position.
- Test the setup gradually with partial bodyweight before attempting a loaded movement.
- Look for movement, shifting, cracking sounds, or changes in the door position.
- Keep your body on the side of the door that makes the anchor tighten rather than pull it open, according to the trainer’s instructions.
- Avoid attaching the system to glass doors, loose interior doors, damaged frames, or any surface that does not feel structurally sound.
If the setup does not pass a cautious test, do not negotiate with it. Use the straps only if you have a reliable alternate anchor, such as an approved fixed point, or choose a floor-based workout instead.
Suspension training gives you more exercise options, but it also makes the anchor part of your workout. Treat the door frame like equipment, not like background scenery.
A simple suspension progression
Suspension training can feel deceptively easy during the first few repetitions because the handles provide support. Then the angle increases, the core begins to work, and the movement becomes much more demanding. Use a progression that keeps technique ahead of fatigue:
1. Start with a body angle that allows smooth, repeatable repetitions.
2. Keep the straps evenly tensioned instead of letting them go slack.
3. Make the movement harder by changing your angle before adding speed.
4. Use shorter ranges of motion if your balance or joint control changes.
5. Stop before the straps, door, or your own position becomes unstable.
This is a good example of where precision beats intensity. A clean set of rows with a moderate body angle will do more for your consistency than an aggressive variation that leaves you unable to control the return.
3. Speed rope and core sliders: the lightest conditioning combination
If suitcase space is your primary constraint, a speed rope and a pair of core sliders are hard to beat. A tangle-free rapid speed jump rope can weigh approximately 0.39 pounds and cost around $8. Compact dual-sided sliders measure roughly 7 by 7 by 0.51 inches, weigh about 0.5 pounds, and may cost around $9. Together, they create a small conditioning and core kit without taking up meaningful room in a carry-on.
The tradeoff is that these tools are more dependent on your environment and your movement tolerance. Jumping may not be appropriate on a hard hotel floor, in a room with a low ceiling, or when your calves, knees, or feet are already irritated from travel. Sliders need a surface that allows them to move. Dual-sided models can work across different floor types, but the surface still affects how quickly they glide.
Using a jump rope without turning every session into punishment
A jump rope is a fast way to raise your heart rate, but more is not automatically better. Begin with short intervals and maintain a quiet, low bounce. Your elbows should stay close to your sides while the wrists do most of the rope rotation. If the rope catches repeatedly, check the length, your rhythm, and the amount of space around you before simply jumping harder.
A hotel-friendly rope session might use:
- Short periods of jumping separated by walking or breathing recovery
- Alternating-foot steps instead of continuous two-foot jumps
- Low-intensity practice rounds focused on rhythm
- A rope-free version when noise, flooring, or ceiling height is a problem
You can also use the rope as a conditioning tool without making it the entire workout. Pair it with squats, incline push-ups, reverse lunges, or a controlled plank sequence. This gives the session more balance and prevents the workout from becoming a repetitive impact block.
Sliders for core and lower-body control
Sliders are small, but they create a large stability demand because your hands or feet can move while your trunk has to stay organized. They work well for:
- Reverse lunges
- Hamstring curls
- Body saws
- Mountain climbers
- Plank knee tucks
- Lateral lunges
- Slow sliding pikes
The key word is slow. Sliders can turn a familiar exercise into a much harder one without adding external weight. If you lose pelvic control during a hamstring curl or your lower back takes over during a body saw, shorten the range and reduce the repetitions.
A useful travel circuit could alternate one rope interval with one slider movement and one strength exercise. For example, perform a controlled rope interval, followed by sliding reverse lunges and incline push-ups. Repeat for several rounds, adjusting the work period to your current energy rather than forcing a fixed number.
This setup is especially useful for travelers who want an energy reset instead of a long strength session. It fits into a small room and can be completed without unpacking an entire kit. It is less useful if you need heavy resistance, dislike impact, or travel with joint symptoms that make jumping uncomfortable.
4. All-in-one portable gyms: the middle ground between minimalism and versatility
Compact portable gym systems are designed to condense a wider range of exercises into one piece of equipment. Some systems, such as Gymijet-style portable home gyms, weigh approximately 6 pounds. That is heavier than a rope and sliders, but still far lighter than a conventional home gym setup.
This category can make sense for travelers who want more resistance-training variety than simple bands provide but do not want to assemble several separate tools. It may also suit someone following a structured online program where the same kit needs to support pressing, pulling, leg work, and accessory exercises.
What you are paying for
The appeal is consolidation. One system may combine cables, handles, resistance elements, and attachment points in a format that fits into a travel bag. The benefit is not that it reproduces every machine in a commercial gym. It is that it gives you more ways to train from a single organized setup.
Expect the most value when you use it consistently for a handful of movement patterns:
- Upper-body presses and pulls
- Squat and hinge variations
- Rotational and anti-rotational work
- Arms and shoulder accessories
- Core movements that use cable or band tension
The potential downside is complexity. A system with multiple attachments can become less useful if you need to spend several minutes remembering how each part connects. The more pieces a kit has, the more your routine depends on setup habits, storage, and a clear training plan.
A portable gym also should not be judged only by its exercise count. “Hundreds of movements” sounds impressive, but your body still responds to the quality of the loading, the consistency of the progression, and the way the session fits into your week. A smaller range of exercises performed with stable technique is usually more productive than constantly switching between novelty movements.
Who should choose an all-in-one system?
Choose this route if:
- You travel often and want one dedicated strength kit.
- You prefer structured resistance sessions over improvised circuits.
- You have enough luggage space for a system around the six-pound range.
- You want more exercise variety than a basic band set can provide.
- You are willing to learn the setup before taking it on the road.
It may not be the best option for a short trip where you only need a few brief workouts. In that case, the extra weight and setup may create more friction than value. The right tool is the one that supports the rhythm of your trip, not the one with the longest product description.
How the four setups compare in real travel situations
The best portable travel workout equipment options become easier to choose when we match them to common constraints.
When luggage space is almost nonexistent
Choose a speed rope, sliders, or a small loop-band set. The rope and sliders are particularly efficient for conditioning and core work. Bands are the better choice when strength maintenance is your first priority.
When you want the closest thing to a full-body strength session
Choose suspension training or an all-in-one portable gym. Suspension training is usually more flexible in terms of bodyweight leverage, while an integrated gym may feel more familiar if you prefer external resistance and multiple attachments.
When the hotel room has limited floor space
Bands and suspension trainers are often easier to use than sliders. A rope requires enough overhead clearance and a surface where jumping will not disturb other guests. Sliders require floor space in both directions, even if the kit itself is tiny.
When you are tired, jet-lagged, or short on time
Use the setup with the lowest activation energy. That may be a band circuit, a short rope interval, or a few suspension movements you already know well. Travel training does not need to be maximal to be worthwhile. A brief, repeatable session can preserve momentum better than an ambitious workout that you keep postponing.
When you want progression across a longer trip
Bands, suspension systems, and all-in-one gyms offer more ways to change leverage, resistance, tempo, and range of motion. Rope and sliders can still progress, but the progression is more likely to come from interval structure, movement control, density, or exercise complexity rather than straightforward load increases.
Build your kit around a minimum effective session
A travel program does not need to look like a reduced version of your home program. It needs a dependable minimum. Choose two or three movements that cover the major demands of training, then add conditioning or core work if your schedule allows.
For example:
- Band setup: squat, row, press, hinge, anti-rotation press
- Suspension setup: assisted split squat, row, push-up, hamstring curl, plank
- Rope and sliders: rope intervals, sliding reverse lunge, push-up, body saw
- Portable gym: press, pull, squat pattern, hinge pattern, core movement
Keep the first session on a trip deliberately moderate. This gives you a chance to learn the room, the floor, the anchor point, and your energy level. You can increase the challenge later by adding a round, slowing the tempo, changing leverage, or shortening rest. That is a more sustainable path than arriving with an aggressive plan and spending the rest of the trip recovering from it.
There is also a practical packing rule worth keeping: bring only equipment that has a clearly assigned job. If the rope is for conditioning, the sliders are for core and unilateral work, and the bands are for strength, the kit earns its place. If you cannot explain how an item fits into your next few sessions, it is probably adding weight rather than value.
The bottom line: choose the routine you can repeat
There is no single winner in this portable fitness equipment comparison. Resistance bands are the most adaptable minimalist option. Suspension trainers offer excellent full-body variety when the anchor is genuinely secure. A speed rope and sliders give you an unusually light conditioning kit at a low entry cost. All-in-one portable gyms provide broader resistance-training versatility in a package that weighs around six pounds.
The best travel workout gear is not defined by how closely it imitates a commercial gym. It is defined by whether it helps you keep a promise to your future self while the rest of your schedule changes.
For your next trip, choose one setup, write down three movements, and place the equipment where you will see it when you unpack. Then make the first session small enough to complete even on a busy day. A few controlled sets before the next meal, meeting, or flight connection can be the win that keeps your training rhythm intact.