Foam Roller Roadmap: From Muscle Tightness to Full Mobility
Muscle tightness is not a single tissue problem. It can reflect reduced joint motion, local fatigue, elevated resting tone, or a protective response to excessive pressure. Foam rolling can modify these variables for a short period.
It does not permanently lengthen muscle. It does not dissolve adhesions on command. It changes sensory input, pressure tolerance, and available range of motion.
That distinction determines the correct foam roller progression for tight muscles. Start with a pressure level that allows controlled breathing and stable movement. Advance only when the current stimulus no longer produces protective contraction. A harder roller is not automatically a better roller. It is only a stronger mechanical input.
The science of self-myofascial release
Foam rolling is a form of self-myofascial release, or SMR. You apply part of your body weight to soft tissue and move through a limited range. The target is usually a muscle belly or other accessible soft-tissue region.
The immediate objective is not to crush tissue. It is to alter the relationship between pressure, discomfort, and movement.
Three responses matter:
- Reduced perceived stiffness. The joint may move through a larger range without a corresponding loss of force.
- Improved short-term mobility. Tissue tolerance and neural output can change within the session.
- Lower post-exercise pain perception. Rolling after training can reduce how sore the region feels over the following period.
The mechanism is not fully resolved. Permanent structural changes in fascia from foam rolling alone are not established. The practical effect is more conservative: the nervous system may permit more motion when the applied pressure is tolerable and the movement remains controlled.
A meta-analysis of 21 studies found that pre-exercise foam rolling produced a small immediate increase in flexibility of about 4.0% and a small sprint-performance improvement of about 0.7%. It did not impair muscle power or strength. After exercise, foam rolling was associated with a 3.9% attenuation of strength-performance decline and a 6.0% reduction in pain perception.
These are acute effects. They do not justify replacing strength training, progressive loading, or joint-specific rehabilitation with a roller.
The roller is a modifier of movement. It is not a structural repair device.
The term “tight” also requires precision. A calf may feel restricted because the ankle lacks dorsiflexion. A hip may feel restricted because the surrounding musculature is fatigued. A quadriceps region may feel rigid because training volume exceeded current tolerance. Rolling can reduce the symptom. It cannot identify the cause by itself.
Selecting the tool: density controls pressure
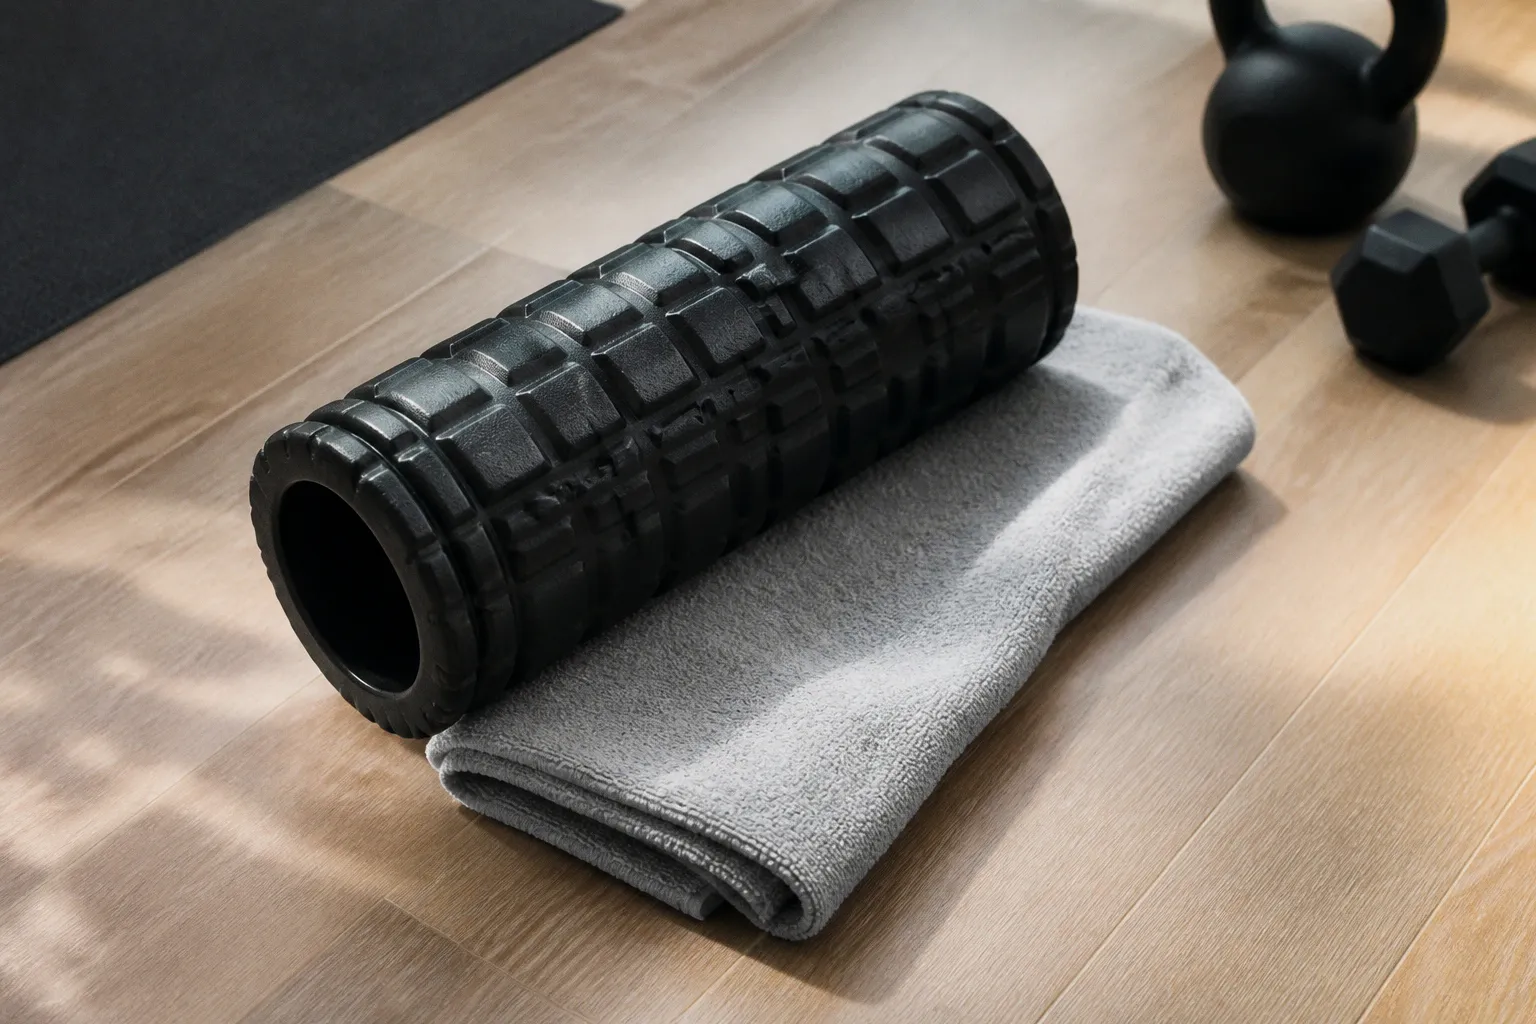
The foam roller’s density determines how much it deforms under load. A low-density roller compresses more. A high-density or textured roller concentrates pressure over a smaller surface area.
This is not a product hierarchy. It is a stimulus hierarchy.
Foam roller density by training stage
| Roller type | Approximate density | Mechanical effect | Appropriate use |
|---|---|---|---|
| Low-density foam | 1.0–1.5 PCF | Compresses easily and distributes pressure | Beginners, sensitive tissue, initial exposure |
| Medium-density foam | 1.5–2.0 PCF | Moderate pressure with better load transfer | General maintenance and regular training |
| High-density foam | Above the medium range | Greater pressure with less deformation | Experienced users with adequate pressure tolerance |
| Textured roller | Varies by construction | Concentrates pressure on smaller contact areas | Targeted work after basic tolerance is established |
Most rollers fall between approximately 30 cm and 36 inches in length. Length affects stability and positioning more than pressure. A longer roller is easier to use for the upper back or bilateral lower-limb work. A shorter roller is easier to transport and can be sufficient for calves, hamstrings, and quadriceps.
Surface texture introduces another variable. Grooves, ridges, and projecting nodes do not reach a magical layer of fascia. They increase local pressure. That can be useful for a specific muscle belly. It can also provoke guarding if the load is excessive.
Use a low-density roller when:
- You have no previous SMR experience.
- The target area is highly sensitive.
- You are working near a recent increase in training volume.
- You cannot maintain relaxed breathing under the current pressure.
- Your technique collapses as soon as the tissue contacts the roller.
Use a medium-density roller when:
- You can complete 1–2 minutes of controlled work without sharp pain.
- The target area tolerates repeated exposure.
- You need a general tool for pre-training mobility and post-training recovery.
- The low-density roller no longer provides a meaningful but tolerable stimulus.
Use a high-density or textured roller when:
- The tissue has demonstrated pressure tolerance over several sessions.
- You can control body weight and contact angle.
- The target is a broad muscle belly rather than a joint or bony surface.
- You can stop immediately if pain becomes sharp, electric, numb, or unstable.
The correct roller is the one that permits a useful response. If the body contracts against it, the tool is too aggressive for the current session.
The 1–2 minute protocol
A foam rolling guide for beginners usually fails at the same point: it describes body positions but not load management. Position determines which tissue receives pressure. Load determines whether the tissue can tolerate the exposure.
Use the following protocol for each target muscle group.
1. Establish the contact zone
Place the roller under the muscle belly. Keep the joint itself off the roller. Do not roll directly over the patella, the tibial crest, the elbow, the spine, or other bony structures.
Move slowly enough to identify the region producing the restriction. Do not scan the entire limb at random. The objective is controlled input to a defined area.
2. Set the pressure
Adjust the amount of body weight transferred into the roller. Use the hands, the opposite leg, or the floor to unload the target.
A tolerable pressure may produce discomfort. It should not produce a sharp pain response, numbness, tingling, or involuntary bracing. The respiratory pattern is a practical control variable. If breathing becomes shallow and forced, reduce pressure.
3. Move through a short range
Roll across a limited section of the muscle. Avoid fast sweeping passes. Fast movement reduces your ability to regulate pressure and identify the response.
Use approximately 1–2 minutes per muscle group. For a specific tender spot, use 30–60 seconds. The purpose is not to remain on the most painful point until it becomes numb. That is an escalation strategy, not a protocol.
4. Reassess the movement
After rolling, perform the movement that was limited. Test ankle dorsiflexion after calf work. Test a bodyweight squat after quadriceps or adductor work. Test shoulder elevation after upper-back work.
If range of motion improves without loss of control, the intervention produced a useful acute response. If the region feels more painful, more rigid, or less coordinated, the pressure or duration was excessive.
5. Add active movement
Foam rolling should not be the final step when mobility is the target. Follow it with active range work. The nervous system needs to use the newly available range under muscular control.
For example:
- Calf rolling followed by controlled ankle dorsiflexion.
- Quadriceps rolling followed by a split-squat position.
- Thoracic rolling followed by active shoulder flexion.
- Adductor rolling followed by controlled lateral weight transfer.
This is the difference between a temporary change in tolerance and a usable movement adaptation.
Foam roller exercises for flexibility
The following sequence covers common training regions. The instructions are deliberately narrow. Broad, imprecise rolling creates more fatigue than information.
Calves
Sit with one calf on the roller. Support the body with the hands behind you. Roll from the lower calf toward the upper muscle belly. Rotate the leg slightly to expose the medial and lateral portions.
Do not drive the roller directly into the Achilles tendon or the back of the knee. These are not muscle bellies. More pressure there does not improve the target tissue.
Use 30–60 seconds on a sensitive region or up to 2 minutes for the full calf group. Follow with slow knee-over-toe ankle motion while keeping the heel controlled.
Hamstrings
Place the roller beneath the posterior thigh. Support your weight with the hands. Roll from the gluteal fold toward the area above the knee.
Do not use the roller as a substitute for posterior-chain loading. Hamstring stiffness can reflect fatigue, reduced hip control, or a lack of tolerance to lengthened positions. Rolling may reduce the immediate sensation of restriction. Romanian deadlifts, split-stance work, and controlled hip flexion develop capacity.
Keep the pelvis stable. Excessive trunk rotation changes the contact point without improving control.
Quadriceps
Place the roller beneath the anterior thigh. Use the forearms for support. Roll between the hip region and the area above the kneecap.
Avoid the patella. Avoid pressing directly into the front of the knee. If the discomfort is concentrated at the tendon rather than the muscle, move the roller proximally.
A useful progression is:
1. Both legs on the roller.
2. One leg on the roller with partial unloading from the opposite foot.
3. One leg with controlled rotation of the thigh.
4. More pressure only if breathing and pelvic position remain stable.
Gluteal region
Sit on the roller with one ankle crossed over the opposite knee. Shift toward the side of the crossed leg. Use the arms to regulate pressure.
This position can produce high local compression. Do not force the pelvis into a rotated position to search for more pain. The target is the gluteal muscle tissue, not the posterior hip joint.
If symptoms radiate below the knee, include numbness, or change with spinal position, stop treating the region as a simple muscle-tension problem.
Upper back
Place the roller across the upper back. Support the head with the hands. Keep the ribs from flaring as you extend over the roller.
Move through the thoracic region. Do not roll directly over the cervical spine or lumbar spine. The lower back is poorly suited to aggressive unsupported rolling because the lumbar region may respond with excessive extension and muscle guarding.
For shoulder mobility, use a short rolling exposure followed by active arm elevation. The goal is thoracic movement that supports the shoulder, not repeated compression of the spine.
Adductors
Start face down with one leg positioned out to the side. Place the roller beneath the inner thigh. Support the torso with the forearms and control the hip position.
The adductor region can be sensitive after sprinting, lateral work, or a sudden increase in range-based training. Begin with partial body weight. Do not roll into the groin or directly over the medial knee.
A muscle that is already irritated does not require a more aggressive roller. It requires lower exposure and better load distribution.
Avoiding the guarding reflex
The central error in self-myofascial release is confusing pain intensity with treatment quality. Excessive force can trigger protective muscle guarding. The muscle contracts because the nervous system interprets the pressure as a threat. The result is lower movement tolerance and a less effective session.
This is not a test of discipline. It is a load-management failure.
Use this pressure scale:
- Low pressure: The tissue is clearly contacted. Breathing remains normal. Movement is controlled.
- Moderate pressure: Discomfort is present but stable. You can remain relaxed and adjust your position.
- Excessive pressure: The body braces, the breath stops, the pelvis shifts, or the region becomes more painful after rolling.
Stop or reduce pressure if you observe:
- Sharp or stabbing pain.
- Burning or electric symptoms.
- Numbness or tingling.
- Bruising that is disproportionate to the exposure.
- Loss of joint control.
- A protective contraction that persists after you unload the roller.
- Symptoms that radiate away from the contact point.
The last point matters. Local muscle discomfort and nerve-related symptoms are not interchangeable. A roller cannot diagnose the difference. It can only increase the risk of aggravating the wrong structure if you continue without adjustment.
Tissue targets that require restraint
Avoid direct rolling over:
- Bones.
- Joints.
- The front and sides of the neck.
- The lumbar spine.
- The kneecap.
- The Achilles tendon.
- The area behind the knee.
- Areas with acute swelling or suspected tissue injury.
The iliotibial band requires particular precision. Rolling directly over the lateral thigh does not lengthen the band in a meaningful way. It often compresses the tissues adjacent to it and may create unnecessary pain. If lateral knee symptoms are present, assess the hip abductors, quadriceps, training load, running mechanics, and joint tolerance instead of attempting to flatten the band with a harder tool.
Pain is not a depth gauge. It is a signal that the current input may exceed tissue tolerance.
Building a muscle recovery roadmap
Foam rolling has different functions before and after training. The dose should change with the objective.
Before training: prepare motion without reducing output
Pre-exercise rolling is useful when a specific movement is limited. Keep the exposure short. Use 30–60 seconds on the relevant muscle group, then perform active movement and the training-specific warm-up.
A practical sequence:
1. Identify the movement restriction.
2. Roll the most relevant muscle group for 30–60 seconds.
3. Re-test the movement.
4. Perform active range drills.
5. Begin progressive warm-up sets.
6. Stop rolling once the movement is adequate.
Do not roll every muscle before every session. That adds time without adding a clear mechanical objective. Pre-training work should improve access to a position. It should not create fatigue or soreness.
For a squat session, the target may be the calves, adductors, or quadriceps if those regions limit depth. For pressing, the upper back and latissimus region may be more relevant. For sprinting, use short exposure and prioritize active drills. The roller is subordinate to the movement requirement.
After training: reduce perceived soreness
Post-exercise rolling can be used for 1–2 minutes per trained muscle group. The goal is lower pain perception and improved tolerance during the recovery period.
Do not interpret reduced soreness as complete recovery. Pain perception and tissue readiness are related but not identical. A muscle can feel better while force production, coordination, or energy availability remains impaired.
Post-training rolling fits well with:
- Low-intensity movement.
- Hydration and adequate nutrition.
- Sleep.
- Reduced training load when performance is declining.
- Progressive return to normal range of motion.
It does not compensate for excessive weekly volume.
On rest days: use only a defined objective
A rest-day session may be appropriate when stiffness limits normal movement. Keep it brief. Select one or two regions. Follow the work with active range drills or an easy walk.
A long, aggressive session on a rest day can become another stressor. Recovery is not improved by accumulating more discomfort.
Progression: when to change density or pressure
Progression should be based on response, not calendar time. Advance when the current load no longer produces a useful change and technique remains stable.
Use this progression:
1. Low-density roller with bilateral loading. Learn contact, breathing, and position.
2. Low-density roller with unilateral loading. Increase pressure through leverage rather than speed.
3. Medium-density roller with bilateral or partial loading. Maintain the same duration.
4. Medium-density roller with targeted positioning. Reduce the contact area only when control remains intact.
5. High-density or textured roller. Use brief exposure on broad muscle tissue.
6. Active range and loaded movement. Convert the acute mobility change into capacity.
Do not increase density, duration, and body weight simultaneously. Change one variable. Otherwise, you cannot identify which input caused a positive or negative response.
A simple progression matrix
| Variable | Initial exposure | Progression |
|---|---|---|
| Density | Low, 1.0–1.5 PCF | Medium, then higher density if tolerated |
| Body weight | Partial support from hands or opposite limb | Greater load through the target tissue |
| Contact area | Broad surface | More targeted position without joint compression |
| Duration | 30–60 seconds | Up to 1–2 minutes per muscle group |
| Movement | Slow, short passes | Controlled position changes and active follow-up |
| Objective | Reduce sensitivity and access range | Maintain range during loaded movement |
If the next-day response is worse, reverse the last progression. Use a softer roller, lower body weight, shorter duration, or fewer target regions.
Common errors in a foam rolling guide for beginners
Rolling too fast
Speed turns the session into low-resolution compression. You miss the difference between muscle discomfort, joint pressure, and nerve symptoms. Slow movement provides better control.
Chasing the most painful point
A tender spot is not automatically the cause of the restriction. Prolonged compression can increase local irritation and guarding. Use short exposure, then test the movement.
Treating the entire body
Full-body rolling is not inherently superior. It may be appropriate after a high-volume session, but the default should be regional and objective-driven. Roll the structure related to the movement problem.
Using the hardest tool immediately
High-density rollers reduce the margin for error. They are less forgiving when your position is poor or the tissue is already reactive. Begin with a load that allows relaxation.
Replacing strength work with mobility work
If a joint repeatedly loses range under load, the solution may be strength and motor control. Foam rolling can open a temporary window. Loaded movement determines whether the system can retain that range.
Treating symptoms that need assessment
Persistent pain, swelling, progressive weakness, altered sensation, or symptoms following trauma require more than a roller. Do not use SMR to repeatedly test an injured structure.
The strict implementation protocol
Use the following protocol for the next session:
1. Select one movement that currently feels restricted.
2. Identify one or two plausible muscle regions involved in that movement.
3. Start with a low- or medium-density roller.
4. Apply partial body weight.
5. Roll the target for 30–60 seconds.
6. Re-test the movement.
7. If range improves and symptoms remain stable, perform active mobility for the same joint.
8. Complete the normal warm-up and progressive loading.
9. After training, roll the primary trained muscle groups for 1–2 minutes each if soreness is the limiting factor.
10. Record the next-day response before increasing density or pressure.
The decision rule is direct:
- Better movement, stable symptoms: maintain the dose.
- No change: reassess the target or remove the roller from the session.
- More pain or reduced control: reduce pressure, shorten duration, or stop.
- Repeated symptoms across sessions: stop escalating the roller and assess the underlying training or medical issue.
Foam rolling works best as a narrow intervention inside a larger system. Use it to improve access to motion, reduce perceived soreness, and prepare a region for active work. Then load the available range. Without that final step, the roller remains a temporary sensory adjustment.
The correct endpoint is not maximal pressure. It is controlled movement with less restriction and no protective response.
FAQ
Does foam rolling permanently lengthen muscles?
How long should I foam roll each muscle group?
What density foam roller should a beginner use?
Where should I avoid using a foam roller?
What should I do after foam rolling for mobility?
More products
 Motion EnergyUSD49