Resistance band workouts: a safety and setup checklist
A resistance band costs less than a sandwich and can outlast most New Year’s resolutions. That is the pitch, and it is roughly true—right up until the band snaps mid-rep and the handle becomes a low-budget catapult.
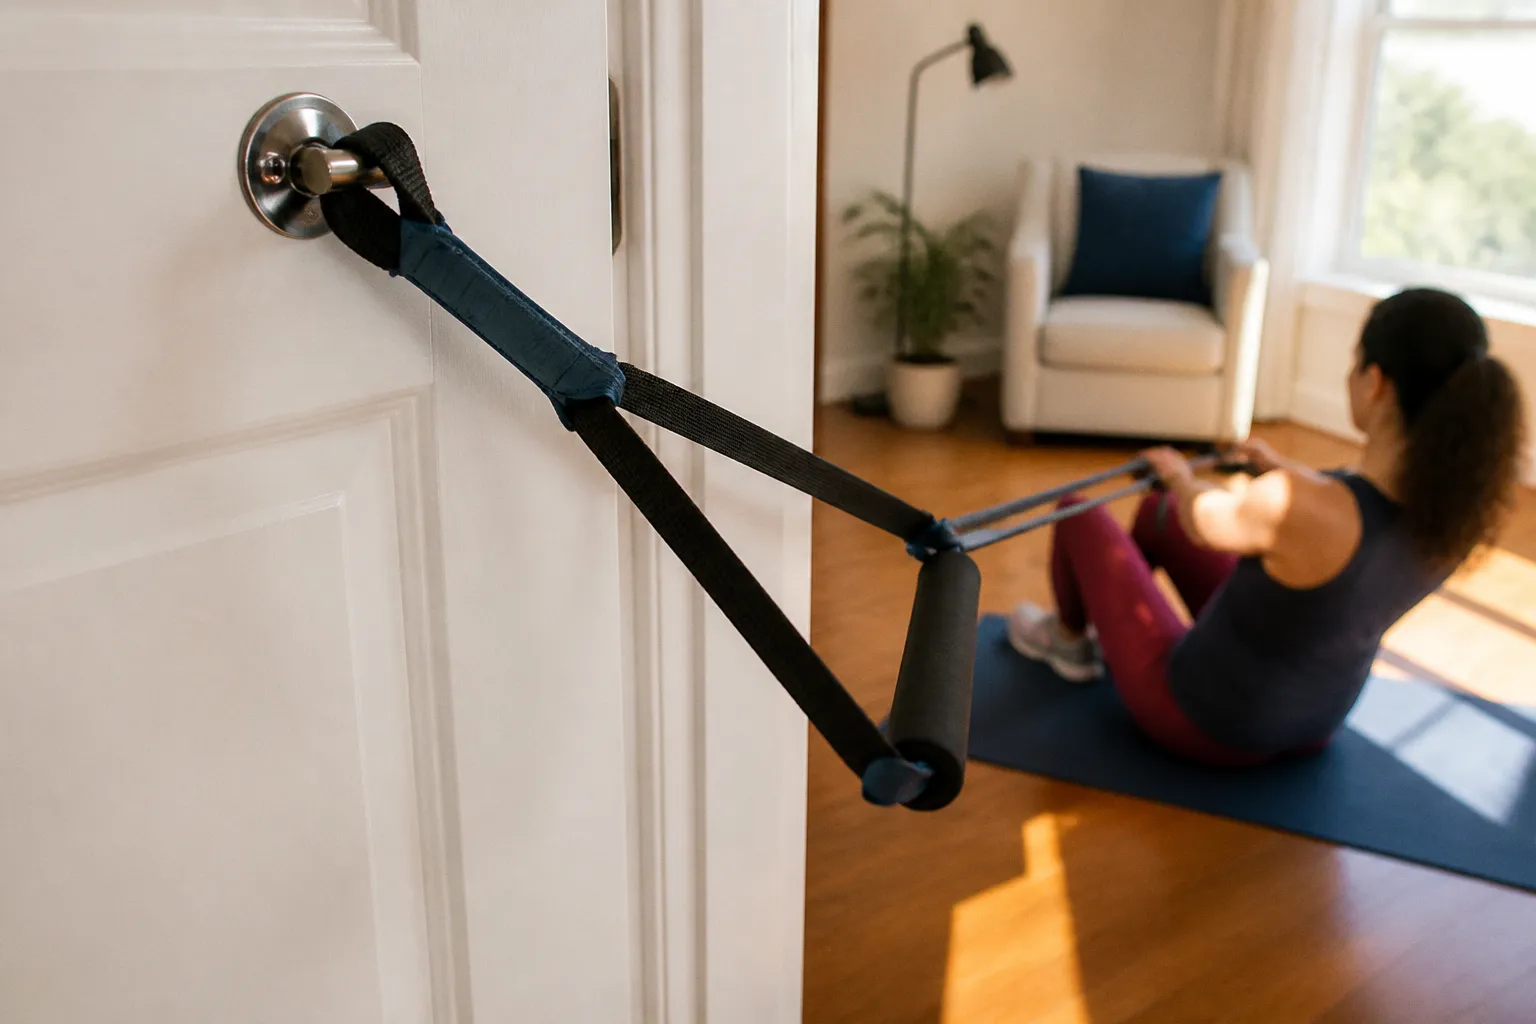
A damaged band can release force quickly, sending the handle, anchor, or the user in an unpredictable direction.
Resistance bands are effective training tools. They are also load-bearing equipment that many people barely inspect. That gap between “useful” and “ready for another session” is where a resistance band workout preparation checklist earns its place.
A 2022 systematic review in the British Journal of Sports Medicine found that elastic resistance training produced strength gains equivalent to conventional resistance training in more than 80% of the comparisons it reviewed. That is a strong case for keeping bands in a home gym, travel bag, or rehabilitation setup. It is evidence about training outcomes, though—not a certification of every band, anchor, door, or stretch limit. Safety still depends on the equipment in front of you and the way you use it.
Before counting reps, spend a few minutes checking the material, the attachment point, the working length, and the load. Five minutes of preparation is cheaper than dealing with a preventable equipment failure halfway through a set.
Inspect the band before the band inspects you
Every workout. Not only when the band starts looking rough. Not only after it has spent a month in a hot car. Latex and rubber can develop damage that is easy to miss when the band is lying flat but obvious when you run your fingers along it.
The most useful resistance band safety inspection is physical rather than visual. Hold the band lightly and move along its full length, checking both sides. Do not stretch it aggressively just to see whether it breaks. You are looking for changes in the material before it is under a working load.
Check for:
- Small nicks, cuts, and edge damage. A nick can be tiny enough to feel before you can clearly see it. Any cut interrupts the continuous surface of the band and creates a point where stress may be concentrated.
- Thin, shiny, or unusually pale sections. A section that looks stretched-out, glossy, sticky, or noticeably different from the surrounding material deserves attention. It may reflect wear, heat exposure, chemical damage, or repeated loading.
- Cracks and surface lines. Look especially near the ends, where the band is held, looped, or attached to a handle. Fine cracks can widen when the band is stretched.
- Stiffness or changes in texture. A band that has become brittle, tacky, hard, or unusually soft is no longer behaving like the material you bought.
- Damaged handles, sleeves, and webbing. Inspect foam grips, stitching, connection points, clips, carabiners, and protective sleeves. Frayed webbing or a cracked plastic component can fail even when the latex itself looks fine.
- Permanent deformation. If the band no longer lies evenly or has a section that stays twisted, flattened, or stretched after release, treat that as a reason to remove it from training.
If you find a meaningful cut, crack, tear, or damaged attachment point, retire the band. Do not move it to a lighter exercise and assume the lower resistance makes the defect harmless. A damaged band has an unknown remaining capacity, and the next failure may depend on angle, speed, temperature, or the exact place where the defect sits.
A nicked band is a loaded spring with a weak point. Treat it like a cracked pipe: replace it, do not patch it.
The same inspection applies to accessories. A handle may feel solid in your palm while its connector is worn. A door anchor may look intact while the stitching around the loop is beginning to separate. If the band connects to another part, inspect the whole chain—not just the elastic strip.
Storage is part of the inspection routine
Storage will not repair an already damaged band, but it can slow avoidable wear. Keep bands away from direct sunlight, radiators, hot windowsills, and places where they can be crushed under equipment. Do not leave them permanently stretched around a heavy object. Avoid contact with oils, solvents, sharp edges, and rough concrete.
Dirt and grit matter because they can abrade the surface as the band moves through your hands, around an anchor, or across the floor. Clean a dirty band with mild soap and water, rinse it, and let it dry flat or fully supported before putting it away. Follow the manufacturer’s instructions if they specify a different cleaning method. Powder should be used only when it is compatible with the material and the maker’s guidance; some products can leave residue or interfere with the surface.
Do not try to predict a failure date from appearance alone. UV exposure, heat, friction, and repeated stretching can shorten service life, but there is no universal calendar that tells you when a particular band will snap. Inspection and replacement are more reliable than trying to calculate the remaining number of workouts.
Door anchors: stop trusting the door just because it is attached to a house
A door anchor can turn a small room into a surprisingly versatile training space. It can also turn a closed door into a moving object if the setup allows the door to open in the direction of the pull.
The first question is not whether the anchor fits. It is whether the door, frame, and direction of force are appropriate for that anchor. Read the accessory instructions and use the configuration recommended for the specific product. Different anchors are designed for different positions and doors.
For a typical over-the-door anchor, check the following before you attach a band:
1. The door is fully closed and secured. “Almost closed” is not a safety feature. Use a lock or another positive closure when the door and anchor design allow it. A latch that is barely engaged, a door that can swing freely, or a lightweight interior door may not provide a stable base.
2. The pull direction works with the door, not against it. The setup should not pry the door open. If the band pulls toward the opening side, the force can act on the latch, hinges, or the top edge in a way the assembly was not meant to handle.
3. The anchor is positioned as directed. Many setups place the anchor toward the hinge side or against a strong part of the frame to reduce the chance of opening, but the correct position depends on the anchor’s construction and the door’s swing. Do not treat “hinge side” as a universal substitute for the manufacturer’s instructions.
4. The door and frame are sound. A hollow-core door, loose hinges, cracked trim, or a weak frame changes the calculation. If the anchor compresses the door, damages the finish, or sits unevenly, stop and find a more suitable attachment point.
5. The band is not rubbing against a sharp edge. The anchor should guide the band smoothly. Any point that pinches, cuts, or twists the latex can become the failure point.
What a pull test can—and cannot—tell you
Before getting into position, apply a gradual test load while standing clear of the band’s line of recoil. Watch the door, frame, anchor, stitching, and connector. You are checking for obvious movement, shifting, creaking, opening, or contact with an edge.
That test is a screening step, not a guarantee. A setup that does not move under a light, controlled pull may still behave differently with a heavier band, a longer range of motion, a faster repetition, a different angle, or a sudden loss of balance. Bodyweight is not a universal substitute for the working load, and a static test does not reproduce every dynamic force in a workout.
Start with a low-tension movement and a short range of motion. Keep your face and joints out of the direct rebound path. If the anchor shifts even slightly, the door flexes, or the band begins rubbing on the hardware, stop and change the setup.
For exercises such as rows, presses, Pallof presses, and chest fly variations, the line of pull should remain predictable throughout the repetition. A stable anchor at the start can still become problematic if you step farther away, rotate, or let the band travel across the top edge of the door.
A door anchor is only as reliable as the door, frame, closure, and direction of pull supporting it.
The 300% stretch rule needs a precise reading
Resistance-band manufacturers often describe a maximum working length as a percentage of the band’s resting length. A commonly used limit is three times the resting length—300% of the original length. That means a band measuring 50 cm at rest would reach 150 cm at the stated limit. It does not mean adding 300% and stretching the band to four times its original length.
Treat that figure as a ceiling, not a target. The exact limit depends on the material, construction, brand, temperature, condition of the band, and the guidance supplied with that product. If the manufacturer gives a lower limit, use the lower limit. A generic rule cannot override the instructions for a particular band.
The practical problem is that people often estimate the stretch from the position of their hands without considering the entire path of the band. A band anchored behind you, looped under your feet, or doubled through a handle may have more than one loaded section. Each section and contact point needs enough room to move without being forced around an edge.
Before a set, ask:
- What is the band’s resting length?
- How far will the attachment point move from the start to the end of the rep?
- Is the band doubled, which changes the length and the feel of the resistance?
- Will the band rub against the floor, a shoe, a door, or a metal connector?
- Is the end position still inside the manufacturer’s recommended range?
Beyond the stated stretch range, the band may be exposed to forces and deformation it was not designed to handle. It may also become difficult to control at the end of the movement. The concern is not simply whether the band feels harder. It is whether the material, anchor, and user can manage the entire movement without excessive elongation or a sudden change in position.
The BJSM review supports the effectiveness of elastic resistance training compared with conventional resistance training in the comparisons it examined. It does not establish or verify a universal three-times stretch safety limit, and it does not tell you whether a particular band is safe to use after damage or prolonged storage. Keep those claims separate: research on training outcomes is not the same as a mechanical inspection of equipment.
If a band feels too light, do not solve the problem automatically by stretching it farther. Use a stronger band, shorten the starting length within the manufacturer’s instructions, add controlled resistance, or choose a variation that changes the leverage. The aim is to create a manageable training load—not to chase resistance beyond the band’s usable range.
Why “I have a green band” tells me almost nothing
Color is convenient, memorable, and frequently misleading. There is no universal resistance scale that makes a green band from one manufacturer equivalent to a green band from another.
TheraBand, one of the brands that publishes tension figures for its products, lists approximate resistance at 100% elongation along a progression that includes:
| Color | Approximate tension at 100% elongation |
|---|---|
| Yellow | About 3 lb (1.4 kg) |
| Red | About 4 lb (1.8 kg) |
| Green | About 5 lb (2.3 kg) |
| Blue | About 7 lb (3.2 kg) |
| Black | About 9 lb (4.1 kg) |
| Silver | Higher resistance |
Those figures are useful reference points for that brand and product range. They are not a universal translation guide. Another manufacturer may use different material thicknesses, lengths, testing methods, color names, or resistance categories. Even within one product family, a loop band, therapy band, tube with handles, and heavy power band may not behave the same way.
When choosing a band, use the color only as an initial label. Then pay attention to the actual training demand:
- Choose a resistance that allows the target movement without compensating. If your shoulders shrug, your back twists, your knees collapse, or you have to jerk the band into position, the load is not under control.
- Use the intended rep range as a guide, not a law. A band that allows a long set with clean technique may be appropriate for endurance work but too light for a strength-focused set. A band that makes the first few repetitions slow and unstable may be too heavy.
- Account for the changing resistance through the range of motion. A movement can feel easy at the start and much harder near full extension. Judge the most demanding part of the rep, not just the first inch.
- Compare like with like. Record brand, band type, length, color, and whether the band is doubled. “Green band” is not enough information for a useful training log.
- Replace a band that has clearly softened or changed. A personal log can show how a band feels over time, but it cannot restore a reliable rating to worn material.
A practical starting point is to select a load that lets you complete the planned repetitions with a controlled tempo and a consistent range of motion. If the final repetitions are challenging without becoming chaotic, the band is doing its job. If you have to shorten the range, hold your breath, or accelerate through the hardest point, change the setup.
Color is a label. Tension is the useful information. Train by what the band delivers, not by what it looks like.
Tempo protects control, not just form
With free weights, a rushed repetition can waste the intended stimulus. With bands, rushing can also make the equipment harder to control. The band stores and returns energy as it is stretched, so releasing it suddenly can create a fast rebound toward the anchor or the user.
A useful starting tempo is about two seconds for the lifting phase and two to three seconds for the lowering phase. It is not a universal prescription, and it does not make an unsafe setup safe. It simply gives you a repeatable way to keep the movement deliberate while you learn how the band behaves.
The common mistake is a sharp yank into the concentric phase, a hard pause at maximum reach, and then an uncontrolled return. That combination makes it more difficult to keep the band aligned and increases the chance that the handle or loop will move quickly if your grip, footing, or anchor position changes.
Use these adjustments:
- Begin with a smaller range of motion until you know where the band becomes difficult to control.
- Keep the band aligned with the intended path instead of allowing it to slide across skin, clothing seams, door edges, or shoe soles.
- Pause briefly only if you can keep the anchor, grip, and body position stable.
- Return the band under control rather than letting it pull you back to the starting position.
- Stop the set when the band starts snapping, twisting, or changing direction unexpectedly.
Tempo is also a load-selection gauge. If you cannot lower the band smoothly, the resistance may be too high, the starting length may be too short, or the exercise may not suit the anchor position. If the band feels completely slack through the part of the movement where it should be challenging, it may be too light or poorly positioned.
Do not confuse slow movement with safety by itself. A slow repetition still produces substantial force if the band is heavily stretched. Control, alignment, and a suitable working length have to agree.
Small setup details change the risk
The same band can be reasonable for one exercise and poorly suited to another. A looped band under both feet behaves differently from a tube attached to a door anchor. A standing row creates a different line of pull from a kneeling press. Your shoes, flooring, grip, and position all affect whether the band stays where you expect it to stay.
Before loading the band, check:
- Footing: Use a stable, non-slip surface. Do not stand on a loose mat that can slide as the band tightens.
- Shoes: Make sure the band cannot roll off the edge of the sole or cut into a sharp part of the shoe.
- Grip: Keep handles, loops, and palms dry enough to maintain control. Do not wrap a band around your hand in a way that could trap your fingers if it recoils.
- Clearance: Remove furniture, pets, and hard edges from the rebound path. Give yourself room to step away if the setup shifts.
- Attachment points: Never assume a table leg, chair, cabinet handle, or radiator can act as an anchor. If the object can slide, tip, rotate, or break, it is not a dependable attachment point.
- Body position: Stay out of the direct line between the anchor and the band’s free end whenever the exercise allows it.
- Multiple bands: If bands are combined, make sure the handles, clips, and anchor can accommodate the added load. More bands also mean more stored energy and more connection points to inspect.
For rehabilitation or post-injury training, follow the range-of-motion and loading instructions given by your clinician. A resistance band can make a movement look gentle while still challenging a healing joint or tendon, particularly near the end of the range.
A preparation routine that takes less time than the warm-up
The point of a checklist is not to turn a simple workout into a laboratory procedure. It is to make the important decisions repeatable, especially on days when you are tired or distracted.
Use this sequence before a session:
1. Inspect the full band. Feel for nicks, cracks, thin sections, texture changes, and permanent deformation.
2. Inspect the connections. Check handles, clips, carabiners, stitching, sleeves, and anchor loops.
3. Choose a suitable location. Remove sharp edges, unstable furniture, and anything that can obstruct the rebound path.
4. Set the door anchor according to its instructions. Confirm the door’s swing, closure, frame condition, and direction of pull.
5. Apply a gradual test load. Look for movement or rubbing, while remembering that a test pull cannot guarantee performance under every dynamic load.
6. Estimate the working length. Keep the band inside the manufacturer’s recommended stretch range, with three times the resting length treated as a commonly cited upper boundary rather than a goal.
7. Select resistance by control and effort. Do not use color as a cross-brand measure.
8. Start with controlled repetitions. Use a manageable tempo and stop if the band shifts, snaps, twists, or behaves differently from the previous repetition.
If any part of the setup fails inspection, change that part before you begin. Replace the band, move the anchor, choose a different exercise, or skip the attachment altogether. A workout can be modified. A failed connection cannot be negotiated with once it is already moving.
Verdict: resistance bands work, but preparation is part of the workout
Resistance band training has a legitimate place in strength work, travel workouts, home training, rehabilitation, and warm-ups. The 2022 BJSM review provides useful support for its effectiveness, showing comparable strength gains to conventional resistance training in more than 80% of the comparisons reviewed. That finding does not remove the need to inspect the equipment or validate a questionable setup.
Bands are simple tools, but simplicity can encourage carelessness. They do not announce that a surface has weakened. A color does not tell you the exact tension. A door that looks closed may still be able to open under the wrong pull. A controlled test can reveal obvious movement, but it cannot promise that every angle and repetition will be safe.
The useful preparation routine is short:
- Inspect the band and retire compromised material.
- Check every handle, connector, and anchor.
- Secure the door and confirm that the force will not pry it open.
- Test the setup gradually, without treating the test as a guarantee.
- Keep the working length within the product’s stated limits.
- Choose resistance by effort, technique, and control rather than color.
- Lower the band deliberately instead of allowing it to snap back.
That is the whole resistance band workout preparation checklist. There is no clever workaround and no app that can compensate for a cracked band or unstable anchor. Give the equipment a few minutes of attention, then train with the load you can control. The bands can do their job. Your job is to make sure they are ready before you ask them to.