Weekly Macro Meal Prep: Your Step-by-Step Roadmap
A macro target is only useful when it can be translated into food you will actually eat. If you weigh 180 pounds and use a range of 0.7–1.0 grams of protein per pound, your daily target starts at about 126 grams.
That is roughly five servings containing 25 grams of protein each—not five whole chicken breasts, and not a fixed number of tuna cans. The number of cans depends on the can size, drained weight, and label. A standard 5-ounce can of tuna may provide roughly 20–25 grams, so the same target could represent about five or six cans if tuna were your only protein source.
That distinction matters because most people do not fail at macro tracking in the app. They fail between the app and the refrigerator. The target is visible, but there is no system for turning it into groceries, cooked portions, and meals that survive a busy week.
Meal prep is that system. It is a sequence: establish a realistic baseline, source protein first, batch-cook compatible foods, understand protein density, and adjust the ratios based on performance and recovery. Once the sequence is familiar, you spend less time negotiating with yourself about what to eat and more time following a plan that has already been built.
Defining Your Macro Baseline: Beyond One-Size-Fits-All
The internet will hand you a ratio such as 40% carbohydrates, 30% protein, and 30% fat. Use it as a starting coordinate if you need one, but do not treat it as a universal prescription. A ratio does not know your body mass, training volume, appetite, body composition, or whether your current goal is fat loss, maintenance, or performance.
Start with the total amount of food you need, then distribute the macros in an order that reflects their job.
1. Estimate your total daily energy expenditure. Use a reputable calculator that accounts for body size and activity, then treat the result as an estimate rather than a laboratory measurement. Your actual maintenance intake becomes clearer after you track body-weight trends, training output, and hunger for a couple of weeks.
2. Set protein first. A practical training range is 0.7–1.0 grams per pound of body weight. If you lift regularly, train with progressive overload, or are dieting while trying to preserve lean tissue, anchoring toward the upper end may make the plan easier to execute.
3. Set a reasonable fat floor. Around 0.3–0.4 grams per pound is a useful planning range for many active adults. It gives meals enough fat for taste and satiety while leaving room for carbohydrates. The exact number still depends on total calories, food preferences, and how your body responds.
4. Put the remaining calories into carbohydrates. Carbohydrates are the most adjustable part of the plan. They support training volume and can be increased or reduced without rebuilding the entire meal-prep system.
The mathematics are simple. Protein and carbohydrates provide about four calories per gram, while fat provides about nine. If you set 150 grams of protein, that allocation accounts for roughly 600 calories before you have added a single grain, fruit, oil, or sauce. The purpose of calculating the baseline is not to create a perfect number. It is to understand what the number requires from your kitchen.
Your macro split is a load-bearing structure. Protein is the foundation. Fat is the framing. Carbs fill the space. Remove any element and the system becomes harder to support.
The ratio that matters is the one calibrated to your body mass, training load, and objective. A 140-pound distance runner and a 220-pound powerlifter have no reason to share the same macro distribution simply because an online template uses a neat percentage split. Let the 40/30/30 model give you a first draft, then override it with your own data.
There is also no requirement to make every meal identical. Your daily total matters more than a mathematically perfect split at breakfast, lunch, and dinner. A protein-light snack can fit if dinner is more substantial. A higher-carbohydrate meal before training can be balanced by a different distribution later in the day. The meal-prep system should create consistency without pretending that every day has the same schedule.
The Protein-Anchor Method: Simplifying Your Grocery Strategy
Most meal prep collapses at the grocery store. People buy ingredients because each one looks useful in isolation, then discover that the ingredients do not combine into enough complete meals. By Monday afternoon they are assembling food by improvisation. By Thursday they are ordering delivery.
The protein-anchor method removes that decision point. Choose the main protein first, then build the rest of the meal around it.
The sequence is straightforward:
1. Choose one or two primary protein sources for the week.
2. Calculate how much protein you need across the meals you plan to prepare.
3. Estimate the cooked amount required from each source, using the nutrition label or a reliable food database.
4. Add carbohydrates and vegetables with similar cooking times and storage needs.
5. Add fats and sauces in measured amounts so they improve the meal without quietly changing the calorie total.
This is not creative cooking. It is logistics. You are solving for a protein number, then backfilling the plate with carbohydrates, produce, and enough fat to make the food satisfying.
| Protein source | Approximate protein per 100 g cooked or ready-to-eat | Useful batch approach | Storage notes |
|---|---|---|---|
| Chicken breast | About 26 g | Cook 3–4 lb for several lunches and dinners | Refrigerate portions for up to four days; freeze later portions |
| Canned tuna in water | About 20–25 g per 5 oz can, depending on drained weight and label | Use 4–6 standard 5 oz cans as a no-cook component across the week | Check the can size and drained weight; rotate seafood choices rather than relying on tuna for every meal |
| Lean ground turkey | About 24 g | Brown 2–3 lb in bulk and divide between bowls, wraps, or salads | Cool promptly before refrigerating; pairs well with rice and greens |
| Whole eggs | About 13 g per 100 g | Boil a batch for breakfasts or snacks | Count the fat as part of the meal, not as an afterthought |
| Plain Greek yogurt | Often around 9–10 g per 100 g, depending on the product | Keep a large container for breakfasts, sauces, and snacks | Compare labels because protein and added sugar vary |
| Lean pork loin | Typically more than 20 g per 100 g cooked | Roast or grill a batch and slice for bowls or sandwiches | Keep portions refrigerated for the first few days and freeze extras if needed |
The tuna detail is not pedantry. A 5-ounce can, a 7-ounce can, and a pouch do not contain the same amount of drained fish. If you are planning around a specific target, record the serving size printed on the label. Do not convert a protein target into a fixed number of cans without knowing what those cans contain.
The same principle applies to food sold by weight. A raw chicken breast loses water during cooking, so the cooked weight will be lower. If you track raw food in your app, weigh it raw and use a raw entry. If you track cooked food, weigh the finished batch and use a cooked entry. Switching between the two methods halfway through the week is how small errors become a large mismatch.
The table is intentionally practical rather than exhaustive. Salmon, bison, tofu, cottage cheese, beans, and protein powders can all fit. The beginner’s goal is not to find the most fashionable protein. It is to choose ingredients that are affordable, available in the required quantity, easy to season, and reliable after several days in the refrigerator.
A good first week might use chicken breast for two meals, Greek yogurt for breakfast or snacks, eggs for convenience, and beans or lentils in a bowl. A different week might use lean pork, tuna, and cottage cheese. Variety is useful, but too much variety creates leftovers that do not form a coherent plan. Start with a narrow system and expand it once the system is working.
Batching for Consistency: The Sunday Workflow
The execution window matters more than the name of the day. You need a protected block of roughly 90 minutes to two hours, whether that block falls on Sunday, Monday, or another day that fits your schedule. The objective is to finish with cooked food, measured portions, and a clear plan for anything that should be frozen.
Phase 1 — Cook the protein
Begin with the food that takes the longest and carries the largest share of your daily target. Season chicken and roast or pan-sear it. Brown ground turkey in a skillet, breaking it into an even crumble so the portions are consistent. Roast pork loin as a whole piece, then slice it after it rests.
The exact cooking time depends on thickness, equipment, and starting temperature. Use a thermometer for meat rather than relying on a memorized time alone. Chicken should reach 165°F internally. Ground poultry also needs to be fully cooked through. This is one place where precision is useful because food safety cannot be solved by visual estimation.
While the main protein cooks, prepare eggs if they are part of the week. Boil them, cool them quickly, and refrigerate them in their shells. If tuna is on the menu, no cooking is required, but portion it when you assemble meals rather than opening every can at once.
Phase 2 — Batch the carbohydrates at the same time
Use the oven and stovetop concurrently. While the protein cooks, prepare rice, quinoa, potatoes, oats, or another carbohydrate that fits your plan.
The earlier estimate of 4–6 cups dry rice or quinoa producing only 8–12 cups cooked is too low for usual cooking yields. Depending on the grain, variety, and water absorption, 4–6 cups dry generally produces approximately 12–18 cups cooked. The exact yield will vary, so weigh or measure the finished batch if you need repeatable portions.
That quantity may be more than one person needs for a week, especially if meals also include potatoes, fruit, beans, or bread. The point is to calculate from the number of servings rather than cooking a large amount automatically. If you need twelve half-cup portions, prepare a batch that reasonably covers those portions. If you cook extra, freeze it in flat, labeled containers so it remains usable instead of becoming refrigerator archaeology.
Roast sweet potatoes, butternut squash, carrots, or other sturdy vegetables on a separate tray. Foods with similar cooking times can share an oven, but do not crowd the trays. Crowding steams vegetables and makes the final texture less reliable.
Phase 3 — Assemble and store
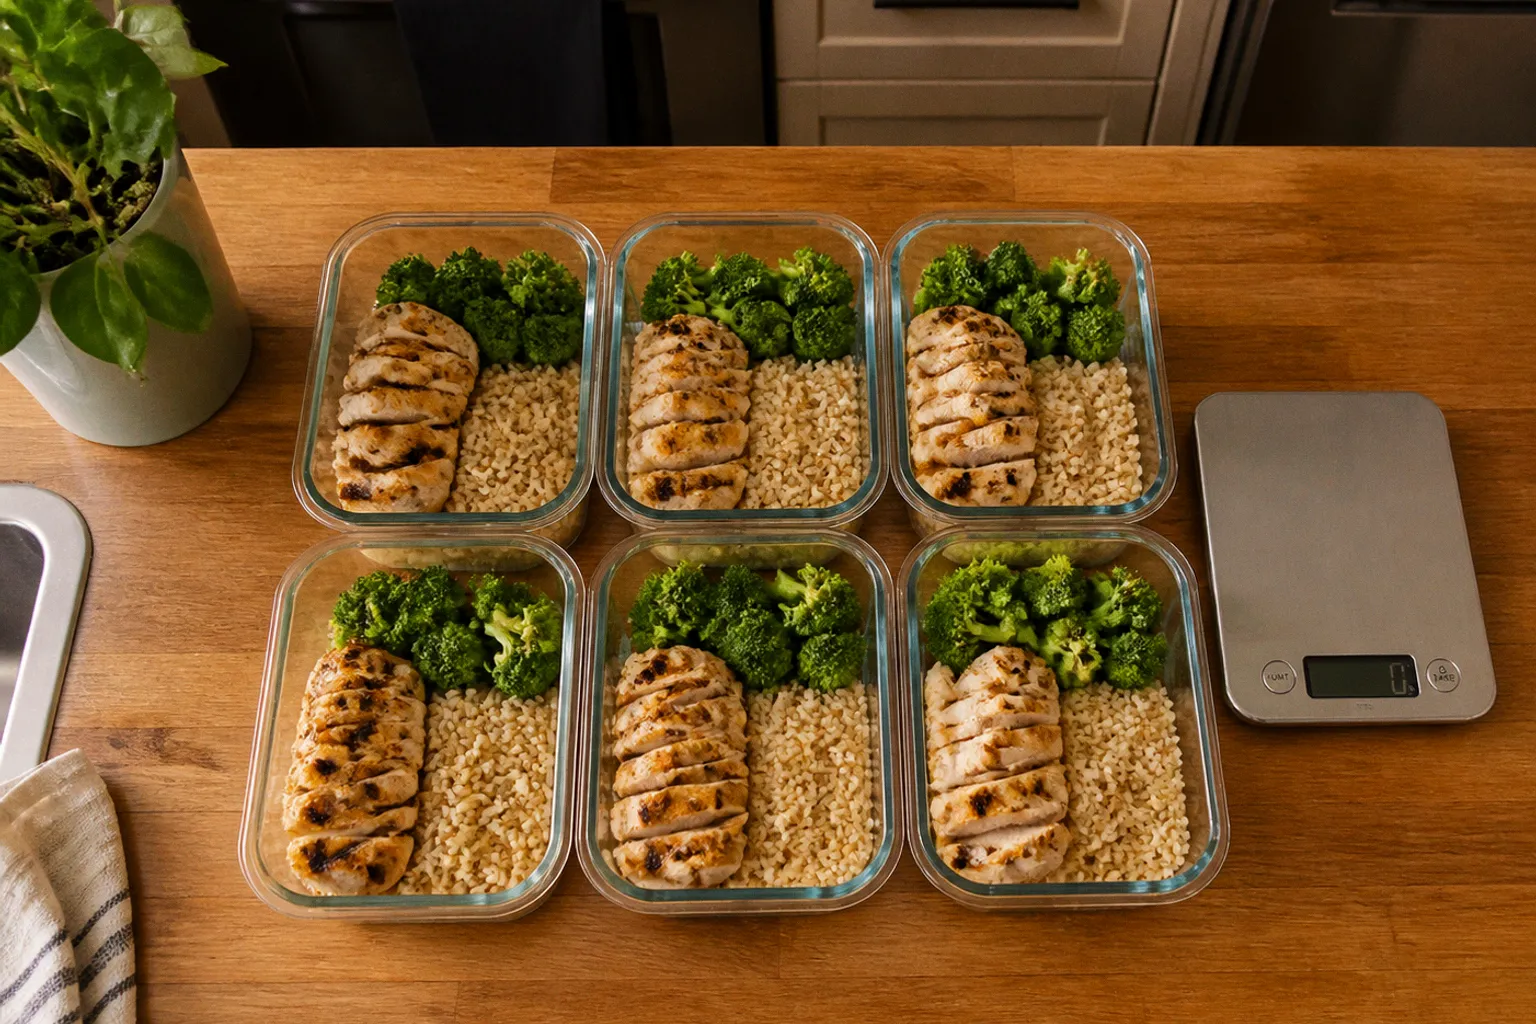
Let hot food cool enough to stop steaming heavily, then portion it into containers. Use a food scale when accuracy matters. Eyeballing a serving of rice, oil, nuts, or cooked meat is not automatically wrong, but it becomes less reliable as the portions get larger and the week gets longer.
Build meals in a repeatable order:
- Add the measured protein.
- Add the carbohydrate portion.
- Add vegetables for volume, fiber, and texture.
- Add a measured fat source or sauce.
- Label the container with its contents and date.
A tablespoon of olive oil, a quarter of an avocado, or a measured serving of almonds can change the energy content of a meal quickly. That does not make those foods a problem. It simply means they belong in the calculation instead of being treated as free additions.
Refrigerate meals you expect to eat within the next few days and freeze the portions that will sit longer. Keep sauces separate when they would make vegetables or grains soggy. Store delicate greens, cut fruit, and crunchy toppings away from hot food. The best macro plan is not useful if the texture makes you avoid it by Wednesday.
The Sunday session is not meal prep as lifestyle content. It is a manufacturing run. Inputs, process, outputs. Treat it with that level of precision.
Phase 4 — Refresh midweek
A Wednesday refresh does not need to become another full cooking session. Give yourself about 20 minutes to assess what remains and repair the weak points.
Check whether you have enough protein for the last part of the week. Cook a secondary source if the first batch is depleted. Wash or cut more produce, prepare another container of rice, restock yogurt, or move frozen meals into the refrigerator to thaw safely.
This two-session model—one primary batch and one short refresh—usually works better than trying to force seven days of identical food into one container. It also gives you a chance to respond to the week you are actually having. If training volume changed, appetite increased, or one meal was less appealing than expected, the refresh keeps the plan flexible without returning you to complete improvisation.
Navigating Protein Density: Chicken, Tuna, and Beyond
Protein density describes how much protein a food delivers for a given weight. A food with about 26 grams of protein per 100 grams cooked is more concentrated than one with about 13 grams per 100 grams. This matters when your target is high and your appetite or total calorie budget is limited.
It does not mean that concentrated foods are always better. Lower-density foods can bring carbohydrates, fiber, minerals, and more variety. They simply require different portion planning.
High-density anchors: generally 20 grams or more per 100 grams cooked
- Chicken breast
- Canned tuna in water, depending on the label and drained weight
- Lean ground turkey
- Shrimp
- Lean pork loin
These foods can carry the center of a lunch or dinner. They are useful when you want to reach a high protein target without making every meal unusually large.
Moderate-density supports: roughly 10–20 grams per 100 grams
- Egg whites, which commonly provide about 11–13 grams per 100 grams
- Whole eggs
- Plain Greek yogurt
- Cottage cheese
- Edamame, which is typically around 12 grams per 100 grams
Moderate-density foods work well at breakfast, in snacks, or alongside a more concentrated protein. Egg whites are useful here, not in the 20-gram-plus category. They can still contribute a meaningful amount of protein; they simply do not deliver the same concentration as cooked chicken or shrimp.
Edamame also belongs in this middle group. It provides protein alongside fiber and carbohydrates, making it useful in grain bowls, salads, and stir-fries. It should not be dismissed merely because it is plant-based.
Lower-density contributors: often below 10 grams per 100 grams
- Black beans
- Lentils
- Some varieties of firm tofu, depending on the product
- Vegetables and grains that contribute smaller amounts of protein
The lower-density category needs more nuance than a simple warning that these foods cannot support a high-protein diet. Beans, lentils, tofu, tempeh, edamame, and other plant foods can form a substantial part of someone’s protein intake when portions, total calories, and the rest of the day are planned around them. The trade-off is that they usually bring more carbohydrate, fiber, or volume per gram of protein than chicken or tuna.
For example, a lentil bowl may need to include a larger serving of lentils, a high-protein grain, tofu, Greek yogurt sauce, or another complementary food to reach the same target as a chicken bowl. That is a planning consideration, not a reason to exclude the ingredients. A person with a higher calorie budget may find the additional volume helpful. Someone dieting aggressively may prefer to use a concentrated protein anchor and include legumes as a supporting component.
Cooked weight and raw weight are not interchangeable. Chicken can lose around a quarter of its mass during cooking because of water loss, while grains absorb water and become heavier. Choose one tracking method for each food and use the matching database entry. If you prepare a large batch, weigh the cooked total and divide it into equal portions. That is more reliable than assuming every piece of chicken or every scoop of rice has the same composition.
Scaling Your Nutrition: Adjusting Ratios for Performance and Recovery
Your initial macro split is a starting load, not a permanent identity. Adjust it using output data: body-weight trends, training performance, hunger, sleep, and recovery. Do not rebuild the plan every time a single weigh-in moves or one workout feels flat.
Run the baseline for roughly two weeks with as few changes as possible. Weigh under similar conditions and look at the weekly average rather than reacting to individual readings. Record the load and repetitions completed in your main exercises, along with a simple note about energy and recovery. The purpose is not to turn eating into a second job. It is to create enough information to distinguish a pattern from a noisy day.
At the end of that period, ask what the data is showing.
- If weight is dropping faster than intended and training performance is sliding, the deficit may be too aggressive. Add food gradually, often through carbohydrates, and reassess.
- If body weight is stable but training output is declining, shift some calories toward carbohydrates, especially around demanding sessions. You may not need more total food; you may need a different distribution.
- If weight, performance, hunger, and recovery are moving in the desired direction, maintain the plan. Do not optimize a system that is already producing the result you want.
- If nothing is changing and your goal is fat loss, review actual portions, oils, snacks, drinks, and weekend meals before making a dramatic macro adjustment. Tracking errors often hide in the foods that are not portioned.
Make one meaningful change at a time and give it enough time to show a pattern. A large shift in protein, fat, carbohydrates, meal timing, and training volume all at once makes it impossible to know what helped.
For strength athletes training frequently, protein can sit toward the upper end of the planning range, while carbohydrates become the main variable that scales with workload. More sessions, more volume, or longer endurance work may justify more carbohydrate. On lighter days, the same protein target can remain in place while carbohydrate portions change modestly.
During a calorie deficit, protein is especially useful for preserving lean tissue, but it is not a license to ignore total energy intake or recovery. Keep the protein target steady, then create the deficit through a combination of carbohydrate and fat adjustments that you can tolerate. A plan that leaves you exhausted, hungry, and unable to train is not made successful by its theoretical precision.
Before the first cycle, write down the actual operating details: your estimated calorie target, protein range, the one or two proteins you will buy, the number of meals you intend to prepare, the containers you need, and the cooking block that will make it happen. Decide whether you will weigh foods raw or cooked. Choose the tracking method—an app, spreadsheet, or paper log—and use it consistently.
Then run the system for three consecutive weeks before deciding whether it works. One week tells you whether you can cook the food. Two weeks begins to reveal a trend. Three weeks gives you enough experience to identify where the process breaks: too much food, not enough variety, poor storage, unrealistic portions, or a training schedule that requires more carbohydrates.
The macro balanced meal prep roadmap for beginners is not a creative exercise. It is a mechanical process applied to a biological requirement. Set the parameters, shop around the protein anchor, batch the foods in a workable sequence, and adjust from measured output rather than frustration. The goal is not to make every meal perfect. It is to make the next meal obvious.
FAQ
How do I determine my daily protein target?
Should I weigh my food raw or cooked?
How can I ensure my meal prep stays fresh throughout the week?
What is the protein-anchor method?
How often should I adjust my macro ratios?
More products