Fitness meal prep: checklist before you start cooking
You've seen them — the influencers with twenty-one identical glass containers lined up like soldiers, each lid perfectly aligned with the next, every grain of rice photogenic enough to make a food stylist weep.
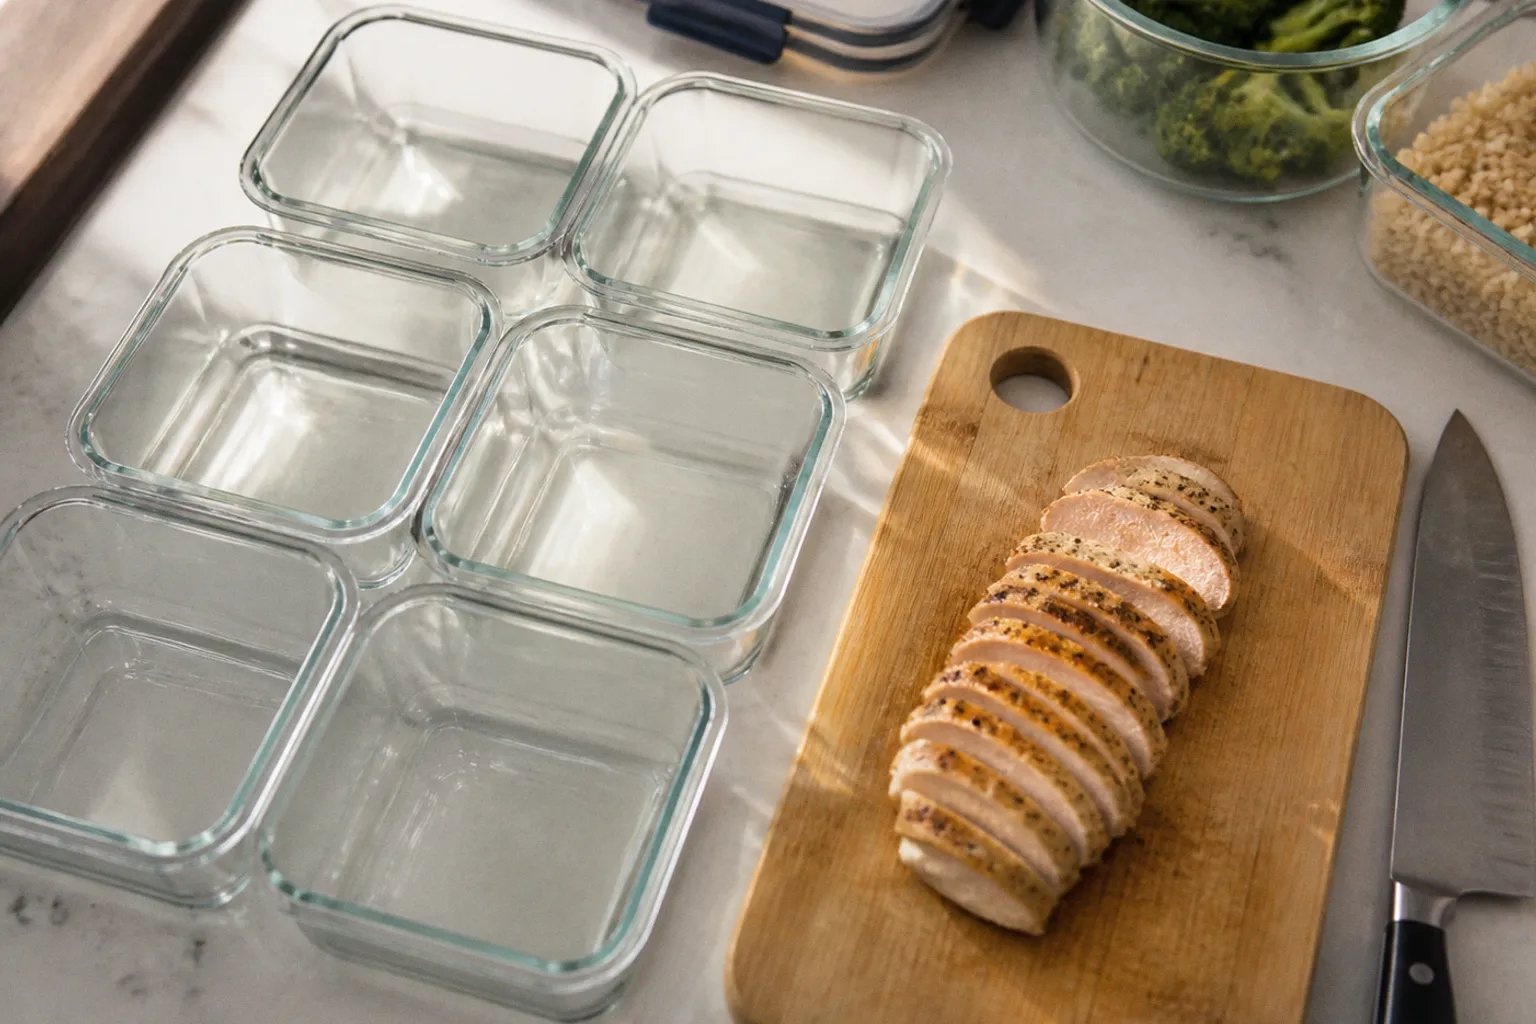
Then they post a “what I eat in a day” reel and half the internet rushes out to buy matching Pyrex.
Here's what nobody tells you: meal prep isn't a personality trait. It's logistics. And like any logistics operation, it falls apart the moment you skip the unsexy groundwork — temperature control, container choice, cross-contamination, realistic portions — and jump straight to the Instagram shot.
I've tested more meal prep “systems” than I care to admit, and the people who actually stick with it aren't the ones with the most aesthetic fridge. They're the ones who did the boring prep before they turned on a single burner. They know what they're cooking, how much they need, where it will go, and when it needs to be eaten or frozen.
That is the difference between “I meal prep for content” and “I meal prep because I have training at 6 a.m. and I'm not waking up to dice a chicken breast.” Use this fitness meal prep checklist for beginners before you start cooking, and skip the part where you reinvent the entire system every week.
Strategic Menu Planning and Macro Alignment
Before you write a grocery list, you need a rough macro target. I'm not talking about weighing every gram of broccoli to the decimal — that's a fast track to quitting by Thursday. I mean a working number for protein, carbohydrates, and fat that actually matches your training goal.
Cutting, maintaining, and adding muscle each pull the menu in different directions. If you're trying to build muscle, a plan made entirely of low-calorie salads will leave you hungry and under-fueled. If you're trying to lose fat, adding generous portions of calorie-dense sauces and oils to every container can quietly erase the deficit you thought you created. The food may be “healthy” and still fail to match the job you're asking it to do.
Start with the meal rather than the recipe. Decide what each portion needs to contribute:
- A reliable protein source, such as chicken, turkey, eggs, Greek yogurt, tofu, beans, fish, or lean beef.
- A carbohydrate source that suits your training and appetite, such as rice, potatoes, oats, pasta, quinoa, fruit, or whole-grain bread.
- Vegetables or fruit for volume, fiber, color, and variety.
- A measured fat source, such as olive oil, avocado, nuts, seeds, cheese, or a dressing.
You don't need every plate to be identical. You do need the overall week to make sense. A strength-training day may call for a larger carbohydrate portion than a rest day. A person who trains before work may prefer a substantial breakfast and a lighter evening meal. Someone who travels between work, the gym, and home may need food that survives a few hours in a cooler rather than a delicate bowl assembled at the last second.
The bigger rookie mistake is trying to cook twenty-one distinct meals in one Sunday. That's not prep, that's a hostage situation. Start with three to four core dishes you can rotate, plus two or three batch components — a protein, a starch, a vegetable, maybe a sauce — that mix and match through the week.
Chicken thighs cooked for the first few days can become a rice bowl, a wrap, or a salad without tasting like the same meal in three different containers. A tray of roasted vegetables can sit beside eggs at breakfast, accompany a grain bowl at lunch, or become the filling for a quick omelet. The combination logic is where meal prep actually saves you time, not the sheer volume you cram into the first session.
There is one important limit: cooked meals kept in the refrigerator should generally be planned for a three-to-four-day window. If you're cooking on Sunday and need food for later in the week, freeze the later portions rather than assuming they will remain safe and appealing in the fridge. Move a frozen portion to the refrigerator in time to thaw, or reheat it safely from frozen according to the food and container instructions.
That small change makes the whole schedule more practical. You can still cook once, but you don't have to force the refrigerator to carry food longer than it should.
Build the menu around repeatable components
A good prep menu has enough repetition to be efficient and enough variation to keep you from ordering takeout by Wednesday. I usually think in components:
1. Choose one or two proteins. Pick something you can season in different ways, or prepare one neutral protein and finish it with contrasting sauces.
2. Choose a dependable carbohydrate. Rice, potatoes, oats, pasta, and grains all work, but portion them according to your target rather than filling every container to the lid.
3. Choose vegetables with different textures. Roasted vegetables hold up well, while crunchy vegetables are often better stored raw and added just before eating.
4. Prepare sauces separately. A sauce can rescue a repetitive meal, but it can also make vegetables soggy and shorten the quality window if everything is mixed too early.
5. Decide which meals will be frozen. Mark them before they disappear into the freezer. Future-you should not have to conduct an archaeological dig through unlabelled containers.
One more thing: recipes that look impressive on Pinterest but require fourteen active steps per serving are not your friends. If a dish needs you to sear, deglaze, reduce, blanch, and plate individually, that's a restaurant menu item, not a batch-cooking candidate. Save the heroics for one dish. Let the rest be workmanlike.
A meal-prep recipe should be judged by how it behaves on a tired weekday, not by how it looks straight from the oven. Does it reheat without drying out? Can you portion it without creating five extra dishes? Will you still want it after seeing the container twice? Those questions are more useful than whether the recipe photographs well.
Equipping Your Kitchen for Efficient Batch Cooking
The container debate is the single most overthought piece of meal prep, and yet somehow people still get it wrong. Here's the honest breakdown from someone who has cracked, stained, and thrown away more containers than he'd like to admit.
| Parameter | Tempered Glass | BPA-Free Plastic | Silicone |
|---|---|---|---|
| Microwave/oven safe | Yes, when the specific container is rated for it | Usually microwave only; check the label | Often microwave-safe; oven limits vary |
| Stain resistance | Excellent | Can stain, especially with tomato or turmeric | Generally excellent |
| Stackability / fridge footprint | Good, though heavier | Usually excellent | Can be awkward when soft or flexible |
| Weight when full | Heavy | Light | Light |
| Real-world practicality | Excellent for home storage and reheating | Excellent for transport | Useful for selected foods and storage |
| Cost per container | Higher upfront | Usually lowest | Mid-to-high |
| Main caution | Thermal shock from sudden temperature changes | Don't use damaged or non-microwave-safe plastic for heating | Seals and lids can wear over time |
The verdict after years of use: glass wins for cooked meals you'll reheat, especially anything acidic or tomato-based. Plastic wins for portable lunches and gym bags because dropping a glass container in a parking lot is a fast way to ruin your week. Silicone can be useful when space matters, but floppy containers are less pleasant when you're carrying something saucy.
Don't force one material to do every job. Use sturdy glass or ceramic for reheating at home. Use a lightweight, intact container designed for food transport when you're taking lunch to work or carrying it to the gym. The label matters more than the marketing language: “BPA-free” does not automatically mean a container is suitable for an oven, high heat, or repeated reheating.
Thermal shock is the glass problem people discover once. Don't take a very cold glass container straight from the freezer into a hot oven unless the manufacturer specifically says it can handle that transition. Let it thaw as directed, use the microwave-safe setting when appropriate, and avoid placing hot glass on a very cold or wet surface. A container that survives years of meal prep can still break if the temperature changes too abruptly.
Beyond containers, you need a real knife — sharp, not the one you've been ignoring for two years — two cutting boards at minimum, a sheet pan or two, an instant-read thermometer, and some basic portioning tools. A kitchen scale takes the guesswork out of macros while you're learning your portions. It doesn't need to become a permanent ritual if you don't want it to; it is simply a useful calibration tool.
A few other pieces earn their place because they remove friction:
- A large mixing bowl prevents vegetables from escaping across the counter.
- Sheet-pan liners or reusable mats reduce cleanup, provided they are used within their temperature limits.
- A set of measuring spoons helps with oils, nut butters, dressings, and other foods that are easy to underestimate.
- Small leak-resistant containers keep sauces away from rice and greens until you're ready to eat.
- A cooling rack helps hot food release steam instead of sitting in a dense, overheated pile.
Everything else — the egg-bite makers, the spiralizer you used once, the vacuum sealer collecting dust — is optional until proven otherwise. Buy the tool that solves a problem you repeatedly have, not the tool that promises to turn you into a different person.
Meal prep is bought with containers, but it's built with a thermometer. Skip the scale, lose a little portion accuracy. Skip the thermometer, lose the meal — and possibly your weekend.
Sanitation Protocols and Cross-Contamination Prevention
This is the section most prep content treats like a footnote. It's the section that decides whether your prep keeps you fed or puts you on the floor. Raw chicken juice dripping onto your spinach is not a cute wellness moment. It's a one-way ticket to a Friday night you didn't budget for.
The rules are simple and non-negotiable:
- Use separate cutting boards. Keep one for raw meat, poultry, or seafood and another for produce and ready-to-eat foods. Color-coding helps. Sticker-labeling helps more if you share a kitchen and someone “doesn't know which is which.”
- Separate utensils for raw protein handling. Tongs that touched raw chicken do not go back into the cooked chicken pile. Not even if you “just rinsed them.” Set a clean utensil aside for the cooked food before you begin.
- Wash your hands between tasks. Wash after handling raw protein, after cracking eggs, after taking out the trash, after touching your phone, and whenever you move from a messy task to food that will not be cooked again.
- Clean prep surfaces deliberately. Wipe counters and boards with hot, soapy water before and after preparation. Cleaning only the visible spill is not the same as cleaning the surface.
- Keep raw proteins contained. Store them in a leak-resistant dish or container on the lowest refrigerator shelf so a drip cannot land on food below.
- Keep ready-to-eat food away from the raw-food zone. Salad greens, fruit, cooked grains, and finished meals should not share a cutting board or crowded counter with raw chicken.
- Don't reuse marinades casually. A marinade that has touched raw meat needs to be cooked thoroughly before it becomes a sauce. Otherwise, discard it.
The refrigerator shelf rule is especially easy to ignore when you're tired and trying to make everything fit. Put raw ingredients below cooked food and produce, not above them. A sealed container helps, but it is not a reason to store raw poultry over an uncovered bowl of chopped vegetables.
The “I'll just be careful” mentality is exactly how people get sick. Cross-contamination doesn't announce itself. It happens through the knife handle you grabbed with contaminated hands, the cutting board you wiped but didn't wash, or the tongs that moved from raw chicken to cooked chicken without anyone noticing.
Build the habit now and your prep becomes boringly safe — which is the only flavor you want here. The goal is not to create a sterile laboratory. The goal is to control the obvious routes by which raw food, dirty hands, and ready-to-eat meals come into contact.
Organize the cooking order
The order of operations can protect both your time and your food. Start with tasks that create no contamination risk: wash produce, prepare a clean work area, portion dry ingredients, and set out containers. Then move to raw proteins, keeping their board and utensils separate. Cook the protein fully, clean the area, and only then assemble ready-to-eat components.
If you're roasting vegetables and chicken on the same day, use separate pans or make sure the food is arranged according to the recipe and safe cooking instructions. Don't place finished chicken back onto the plate that held it raw. That plate is not magically clean because the chicken has changed color.
Meal prep is repetitive, which is useful here. A consistent sequence means fewer decisions and fewer chances to improvise a shortcut when the kitchen gets crowded.
Temperature Control and Safe Storage Timelines
Welcome to the part of meal prep nobody puts in the aesthetic photos: thermodynamics. Cooked food sitting between 40°F and 140°F (4°C to 60°C) is commonly described as being in the temperature danger zone, where harmful bacteria can multiply quickly. The two-hour rule matters: cooked food should not sit at room temperature indefinitely while you portion, photograph, answer messages, and clean every pan in the house.
Cool it down promptly and get it into the refrigerator within two hours of cooking. You do not need to leave a huge pot of steaming food on the counter until it reaches room temperature. Divide large amounts into shallow containers so heat can escape more efficiently, keep portions reasonably small, and leave space around hot containers in the refrigerator rather than packing them together so tightly that cold air cannot circulate.
Don't seal a container full of aggressively steaming food and expect the refrigerator to solve everything instantly. At the same time, don't wait for hours while food cools on the counter. Portioning is the practical middle ground: smaller amounts cool faster, and the food gets under refrigeration without an unnecessary delay.
Your refrigerator should be at or below 40°F (4°C). A fridge that feels cold is not a measurement, and the door shelves are usually warmer and less stable than the interior. Store short-life foods in the colder main section, use the door for items that tolerate temperature changes better, and avoid repeatedly opening the fridge while hot food is cooling.
Cooked meals containing meat, starches, or cooked vegetables should generally be planned for a three-to-four-day refrigerated window. That is the useful limit to build your schedule around, not a challenge to stretch food until Friday simply because it still looks acceptable. If you cook on Sunday and need a portion beyond that window, freeze it. Freezing is part of a good meal-prep system, not evidence that the plan failed.
| Food Category | Refrigerator at or below 40°F / 4°C | Freezer at or below 0°F / −18°C |
|---|---|---|
| Cooked poultry, beef, or pork | Generally 3–4 days | Best quality varies by preparation; label and use within a reasonable planned window |
| Cooked grains such as rice, quinoa, or pasta | Generally 3–4 days | Freeze in meal-size portions for later use |
| Cooked vegetables | Generally 3–4 days | Freeze, though texture may soften after thawing |
| Raw marinated protein | Usually 1–2 days, depending on the ingredient | Freeze if it will not be cooked promptly |
| Soups and stews | Generally 3–4 days | Freeze in leak-resistant, portioned containers |
| Sauces and dressings without dairy | Often several days; check ingredients and condition | Freeze when the recipe tolerates it |
| Dairy-based sauces and dressings | Shorter quality window; follow the recipe and inspect before use | Freezing can change the texture |
These timelines are not permission to ignore the food in front of you. If something smells sour, looks slimy, has visible mold, or has been stored under uncertain conditions, throw it out. A meal that “probably” stayed cold is not worth trying to rescue because you already paid for the ingredients.
Label everything with the date it went into the refrigerator or freezer — masking tape and a marker, not your memory, because your memory is the second thing to fail after your portion control. Add the name of the meal if the container is opaque. If you freeze several similar meals, write down what is inside and how it should be reheated.
Reheat food until it reaches 165°F (74°C) internally. This is where the instant-read thermometer earns its place in the drawer. Stir food partway through microwave reheating, rotate the container if your microwave heats unevenly, and check the thickest or coolest section rather than taking one optimistic reading from the edge.
A surface that feels hot is not proof that the middle is hot. Soup that steams does not guarantee that every part crossed the same temperature threshold. The thermometer doesn't lie, and it doesn't require you to gamble with your Saturday.
Reheating Techniques for Optimal Nutrient Retention
The last ten feet of meal prep is where most people ruin perfectly good food. Microwaving a chicken breast on full power for five minutes produces a rubber puck that tastes like the inside of a yoga mat. There's a better way, and it doesn't require any equipment you don't already own.
For dense proteins, low and slow wins. Microwave at 50–70% power in short bursts with a splash of water or broth, covered loosely. Steam keeps moisture in; lower power reduces the chance of the outside becoming tough before the center is hot. Let the food stand for a short moment between bursts so the heat can distribute instead of attacking the edges over and over.
For starches such as rice and quinoa, the same logic applies: add a small amount of water, cover loosely, use moderate power, and stir partway through. A dry grain bowl often needs moisture more than it needs extra time. If the food is frozen, use the defrost setting or a lower-power cycle first, then reheat until the center is fully hot.
On the stovetop, a covered pan and a spoonful of water or broth can bring rice, grains, meatballs, and saucy dishes back to life without turning the outside into a crust. Keep the heat moderate and stir when the food allows it. For soups and stews, bring the contents through evenly rather than judging readiness by a few bubbles at the surface.
The oven works well for foods that benefit from dry heat: roasted potatoes, breaded pieces, sheet-pan vegetables, and casseroles. Cover foods that are already tender or prone to drying, and uncover them near the end if you want the surface to crisp. There is no prize for reheating every meal on maximum heat.
Protect texture before you reheat
The best reheating strategy often starts during assembly. Keep ingredients with different moisture levels separate when possible:
- Store dressing away from greens.
- Keep crunchy toppings in a small dry container.
- Add fresh herbs after heating.
- Store avocado, cucumber, and delicate leaves separately if they do not hold well.
- Leave sauces on the side when they would make grains or roasted vegetables soggy.
- Slice or shred protein after reheating when that gives you better texture.
Finish fresh where it counts. Add herbs, a squeeze of citrus, hot sauce, or a drizzle of good oil after reheating, not before. Those delicate flavors can flatten under heat and reappear as nothing. A meal does not need to be cooked from scratch every day to taste fresh; it needs one or two elements that have not been sitting in steam for four days.
Vegetables especially require a little judgment. Broccoli reheated repeatedly can become a sad vegetable. Eat some vegetables raw, briefly blanch them, or roast a fresh tray on the day you're eating them. Keep crunchy peppers, shredded cabbage, carrots, and fresh greens separate from hot food until serving. That's not a meal-prep failure. That's good cooking applied to a schedule.
Don't reheat in the same plastic container you'll be eating from, especially if it is old, scratched, warped, or not specifically labeled microwave-safe. Use glass or ceramic for reheating when practical and reserve lightweight plastic for transport and cold storage. The point is not to panic about every plastic container in your kitchen. The point is to follow the manufacturer's instructions and stop asking a damaged container to perform a job it was never designed to do.
If you're taking food to the gym or office, reheating is only one part of the temperature problem. Use an insulated bag and a cold pack for food that must stay chilled during transport. A meal that was safely refrigerated can still become unsafe if it sits warm for hours before you eat it. Pack the food last, leave the refrigerator last, and don't treat a warm car as a food-storage appliance.
If your prepped meal on day four tastes worse than day one, you're not a bad cook. You're fighting thermodynamics, moisture migration, and limited storage time. All three win eventually, so plan around them instead of pretending they aren't there.
Make the system easy enough to repeat
The first meal-prep session is usually too ambitious. You buy ingredients for seven recipes, dirty every pan in the kitchen, and discover that portioning twenty containers takes longer than the actual cooking. Then the leftovers sit untouched because you made too much of one thing and not enough of what you genuinely like eating.
A repeatable system is smaller. Choose a short menu, prepare the components that save the most time, and leave a little room for food you can make fresh. You may only need two cooked proteins, one grain, one tray of vegetables, breakfast ingredients, and a sauce. That can cover several meals without making your refrigerator look like a catering operation.
Before you start cooking, check four practical questions:
- Do I have enough storage space? Count containers before buying ingredients.
- Which meals need to be refrigerated and which should be frozen? Decide this while portioning, not three days later.
- What will I eat first? Put early-week meals where you can see them.
- What needs to stay fresh? Keep toppings, herbs, dressings, and crunchy ingredients separate.
- How will I transport and reheat each portion? A meal that cannot leave the house with you is not solving your weekday problem.
This is also where many meal prep for fitness mistakes begin: not with a bad recipe, but with a plan that ignores the actual week. If you have a late meeting on Tuesday, don't assign yourself a meal that requires assembly, reheating, and three separate toppings. If you train early, place breakfast portions at the front of the refrigerator. If you know you dislike reheated fish, don't prepare five portions of it because the macros look perfect on paper.
The best meal plan is the one that survives contact with your schedule. Nutrition matters, but compliance is not a moral quality. It is usually a design problem.
The Verdict
Yes, meal prep is worth it — but only the kind built on the unglamorous details this checklist covers. Set macro targets that match your training. Buy ingredients for three or four realistic dishes instead of twenty-one separate meals. Choose containers for what they do rather than how they photograph. Separate raw and ready-to-eat food. Cool cooked meals promptly, keep refrigerated portions within a three-to-four-day window, and freeze what you will not eat in time.
Then reheat with enough patience to protect the texture you worked to create. Add fresh elements at the end. Label the containers. Carry chilled food in a cold bag. None of this is exciting content, but it is what turns a Sunday cooking session into food you will actually eat.
The fitness industry sells meal prep as a vibe. It is not. It is a logistics system with food-safety rules, portion decisions, and a few small cooking techniques that keep chicken from becoming rubber and rice from becoming cement.
So here's my final word: buy the thermometer before you buy the matching containers, plan a menu your real week can handle, and treat the three-to-four-day refrigerator window as a limit rather than a suggestion. Freeze the later portions. Keep raw food separate. Reheat thoughtfully. Do that and you'll actually eat what you prepped, which is the entire point.
FAQ
How long can I keep meal-prepped food in the refrigerator?
Should I use glass or plastic containers for meal prep?
How can I prevent my reheated chicken from becoming dry and rubbery?
What is the best way to handle raw and cooked food in the same kitchen?
Is it safe to put hot food directly into the refrigerator?
More products
 FitSpressoUSD59