Fitness Meal Prep: What to Assess and Gather Before Starting
Buying containers is not the same thing as preparing food. You can fill an entire cabinet with matching glass boxes and still have no workable plan for what you are eating, how much you need, how…
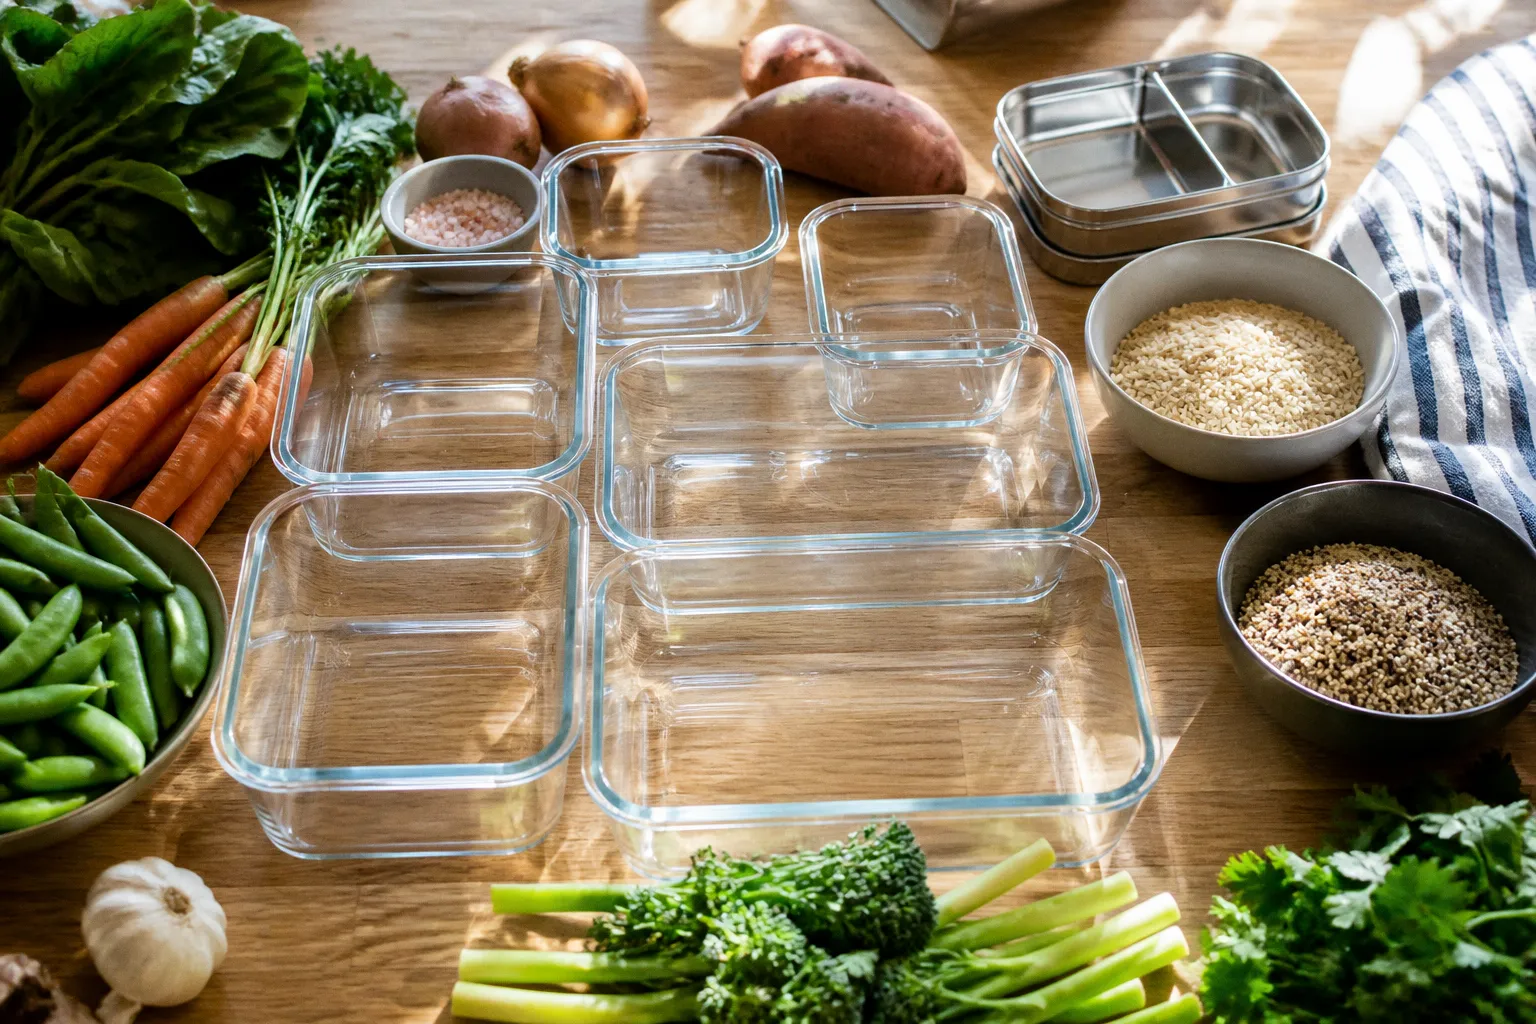
Buying containers is not the same thing as preparing food. You can fill an entire cabinet with matching glass boxes and still have no workable plan for what you are eating, how much you need, how long it will stay safe, or where the food will go once it is cooked. The containers are the easy part. The decisions come first.
This fitness meal prep checklist is not a collection of trendy gadgets for a better-looking kitchen counter. It is a working inventory of what to assess before you cook, store, transport, and reheat food without wasting money, time, or your digestive system. A good setup has to fit your calorie needs, training schedule, refrigerator, cooking space, and tolerance for repetition. If it does not, even the most impressive Sunday cooking session will collapse by Wednesday.
Meal prep for fitness essentials are mostly unglamorous: a clear nutritional target, reliable measuring tools, safe storage, and a workflow that gets food cold quickly. Once those pieces are in place, recipes and containers become much easier to choose.
Defining Your Nutritional Baseline Before You Prep
Before you touch a single container, answer the question most meal-prep content avoids: what are you actually preparing for?
“Eating healthy” is not a calorie target. “Getting fit” is not a macro split. You might be trying to lose fat while preserving strength, gain muscle, support endurance training, or simply stop relying on takeout after a long workday. Those goals can use many of the same foods, but they do not necessarily require the same portions.
Your nutritional baseline is the starting point for the rest of the setup. It includes your approximate calorie needs, a protein target, the amount of carbohydrate that supports your training, and the fats that make meals satisfying and nutritionally complete. You can estimate this with a TDEE calculator, work with a coach, or use several weeks of consistent tracking to see how your intake relates to body weight, performance, hunger, and recovery. The method can vary. Skipping the assessment cannot.
If you prepare four meals a day at 600 calories each while your actual maintenance needs are higher, you may gradually lose weight and performance when you intended to build strength. If your portions are much larger than you need, body fat may increase and the meal-prep system will take the blame. The system did what you asked. The target was wrong.
That is why a high protein meal prep setup should begin with a number or range rather than a vague intention to include more chicken. Decide how much protein you want across the day, then divide it between meals in a way you can repeat. A person who prefers three substantial meals will portion differently from someone who eats four meals and a snack around training. Neither approach is automatically superior.
Your baseline should also account for the meals you will not prepare at home. If you eat lunch at work twice a week, have a family dinner most evenings, or use a protein shake after training, those calories and nutrients belong in the plan. Preparing every meal in advance is not a badge of discipline. It is just one possible logistics strategy.
A useful starting assessment includes:
- Your training schedule: Hard lifting days, long runs, rest days, and early-morning sessions may not all need identical meals.
- Your eating pattern: Decide whether you are preparing full meals, components, snacks, or some combination.
- Your protein distribution: Look at the whole day instead of trying to force an extreme amount into one dinner.
- Your appetite and digestion: Large portions of beans, cruciferous vegetables, dairy, or very high-fiber grains may not work well before training.
- Your storage reality: Count the refrigerator shelves, freezer space, work fridge access, and containers you can actually wash.
- Your schedule: A meal that requires reheating and assembly is not a convenient option if you eat between meetings without a kitchen.
The container is not the plan. Your nutritional target, eating schedule, and storage limits have to be clear before the first batch goes into the oven.
Portion sizes flow directly from this baseline. Weighing food is useful when you are learning what your normal portions look like, adjusting intake, or trying to make several meals reasonably consistent. It does not mean every green bean must be treated like laboratory equipment. The point is to replace accidental inconsistency with information.
Think in components as well as finished meals. A batch of roasted chicken, cooked rice, vegetables, sauce, and fruit can become several different meals during the week. This approach gives you more flexibility than sealing five identical boxes and hoping you still want the same combination on Thursday. It also makes it easier to adjust portions: more rice on a demanding training day, more vegetables when you want volume, or a smaller serving when the meal is paired with something else.
Essential Kitchen Gear for High-Protein Meal Planning
The equipment list for serious fitness meal prep is shorter than the internet suggests. You need tools that make measuring, cooking, cooling, storing, and cleaning easier. Anything that only makes the setup look more committed can stay in the shop.
A digital kitchen scale
A digital scale is one of the most useful fitness meal prep kitchen tools because it gives you repeatable portions without relying on visual guesses. Choose one with a tare function so you can place a bowl on the platform, reset the display, and add ingredients without doing mental arithmetic.
The scale does not need to be expensive or elaborate. It should have a readable display, a surface that is easy to wipe, enough capacity for the bowls and ingredients you use, and a unit setting that works for your recipes. If you track cooked rice, raw meat, oats, or baking ingredients, decide in advance whether you will weigh foods before or after cooking. Mixing methods from meal to meal makes your numbers less useful.
The most important habit is consistency. If you log chicken by its cooked weight but rice by its dry weight, that can still work if you understand the difference and record it accurately. The problem is not choosing one method over the other. The problem is switching without noticing.
Containers that match the food
Glass containers are durable, non-porous, and practical for reheating, but they are heavier and can take up more space. Plastic containers are lighter and convenient for transporting meals, provided they are clearly labeled for food use and microwave use. Avoid containers that are warped, cracked, badly stained, or missing their original safety information.
A container should also fit the portion. Oversized boxes leave food sliding around and make a packed lunch harder to carry. Very shallow containers cool food more efficiently, while deep containers are less convenient for large hot portions because the center stays warm longer. A collection of a few sizes is usually more useful than a large set of identical boxes.
Check the lids before committing to a system. A container that seals securely, stacks well, and can be washed without trapping sauce in the corners will earn its shelf space. A beautiful container with a lid that leaks curry into your work bag is not a success.
A refrigerator thermometer
The built-in dial or digital display on a refrigerator tells you what the appliance is set to do, not necessarily what is happening on every shelf. A separate refrigerator thermometer provides a more useful check, especially if the door is opened frequently, the appliance is crowded, or food seems to spoil earlier than expected.
Keep the refrigerator at or below 40°F (4°C), and avoid packing it so tightly that cold air cannot circulate. The coldest area may not be the door shelves, which are exposed to warmer air every time the door opens. Store highly perishable foods in the main refrigerated compartment rather than treating the door as a general-purpose shelf.
Sheet pans, a sharp knife, and a sturdy cutting board
Sheet pans let you roast proteins and vegetables in batches without requiring several pots at once. Parchment can reduce cleanup for some foods, although it is not a substitute for cleaning a pan properly.
A sharp chef’s knife is safer and faster than a dull blade because it requires less force and gives you more control. Use a board that stays stable on the counter. If it slides, place a damp towel underneath it. Replace or retire boards with deep grooves that are difficult to clean.
You may also want a colander, measuring spoons, mixing bowls, a can opener, and a few freezer-safe bags or containers. None of these tools is glamorous. All of them can prevent a prep session from turning into a series of small interruptions.
| Gear | Why it matters | What to look for |
|---|---|---|
| Digital kitchen scale | Makes portions and recipe quantities more consistent | Tare function, clear display, easy-to-clean surface |
| Glass containers | Durable and suitable for many reheating situations | Secure lids, stackable shapes, appropriate sizes |
| BPA-free food containers | Lightweight for work, commuting, and gym bags | Clear microwave-use labeling and intact plastic |
| Refrigerator thermometer | Confirms the actual storage temperature | A readable model that can remain in the refrigerator |
| Sheet pans | Roast several components with little active work | Heavy enough not to warp easily and simple to wash |
| Chef’s knife and cutting board | Speed up chopping and improve control | A stable board and a knife kept properly sharp |
| Freezer-safe storage | Protects meals planned for later in the week | Tight seals, labels, and enough room for expansion |
The point of a high protein meal prep setup is not to own every tool. It is to remove the specific bottlenecks that make you abandon cooking: inaccurate portions, too much cleanup, nowhere to cool food, or containers that cannot survive transport.
Mastering Food Safety and Temperature Control Standards
Food safety is not an optional layer added after the meal looks finished. It is part of the recipe.
Keep the refrigerator at or below 40°F (4°C) and the freezer at 0°F (-18°C) or lower. These temperatures do not make food immortal, but they slow the growth of microorganisms and help preserve quality. A crowded refrigerator, a faulty door seal, or frequent opening can affect how consistently food stays cold, which is why an independent thermometer is useful.
Cooked leftovers are generally best used within three to four days when stored correctly in the refrigerator. If you will not eat a portion within that window, freeze it instead of hoping the food will remain safe because it still looks normal. Smell and appearance are not reliable tests for every foodborne hazard.
Raw meat and seafood need their own schedule. Keep them refrigerated, prevent their juices from contacting ready-to-eat foods, and cook or freeze them promptly rather than letting them sit in the refrigerator through an entire work week. Store raw poultry and meat on a lower shelf in a leakproof container so a drip cannot contaminate prepared meals or produce.
The room-temperature clock matters too. Perishable food should not remain at room temperature for more than two hours. In very hot conditions, the safe window is shorter. That includes food waiting on the table, sitting in a warm car, or cooling on a counter while you take a long break from the kitchen.
The correction many meal-prep routines need is simple: do not leave cooked food on the counter for hours to “cool naturally.” Divide large batches into shallow containers, allow steam to escape safely as appropriate for the container, and refrigerate promptly. Smaller portions lose heat faster than one deep pot or tightly packed container. Arrange them so cold air can circulate, and once the food has chilled, seal the containers fully.
There is no need to wait until a large batch reaches room temperature before refrigerating it. Prompt refrigeration in shallow containers is safer than prolonged counter cooling. If you have made a very large amount of food, separate it into smaller portions before it goes into the refrigerator. Do not overload the appliance with a hot stockpot that can warm the surrounding food.
When reheating, heat the portion thoroughly and stir dense foods so the center does not remain cold while the edges are steaming. A food thermometer can help when you are reheating a large, dense portion or cooking proteins whose doneness is difficult to judge by appearance. Reheat only what you plan to eat when possible; repeated cooling and reheating increases both quality problems and handling opportunities.
Safe meal prep is a temperature-and-time problem, not a motivation problem. Get food cold promptly, store it cold, and stop asking appearance to do the work of a thermometer.
Preventing cross-contamination is just as important as hitting the right temperature. Use separate boards or wash the board, knife, and counter thoroughly after handling raw proteins. Wash your hands before portioning cooked food. Keep raw marinades away from finished meals unless the marinade is boiled and handled as a cooked sauce.
Optimizing Storage Life for Proteins and Fresh Produce
Proteins and produce tend to fail for different reasons. Protein quality and safety are strongly affected by time, temperature, and handling. Produce is often defeated by moisture, bruising, oxygen, or an unsuitable storage method. Treating everything the same is how a meal-prep refrigerator ends up with both dry chicken and a bag of wet spinach.
Proteins
Cooked proteins should be portioned into shallow containers and refrigerated promptly. Once chilled, keep them sealed to reduce drying and prevent the food from absorbing refrigerator odors. If you are preparing meals for later in the week, freeze those portions soon after cooking rather than holding them in the refrigerator beyond the recommended window.
Chicken breast is convenient but unforgiving. It dries out quickly when overcooked and becomes even tougher after reheating. Thighs, lean ground meat, fish, tofu, eggs, beans, and yogurt can all contribute to a high-protein plan, but each has a different texture after storage. Choose at least a few options instead of assuming every meal has to be built around chicken.
Sauce can protect texture, but keep it separate when it will make a meal soggy. This is especially useful for roasted vegetables, greens, grain bowls, and wraps. A small leakproof cup inside the main container gives you control over the final texture and makes it easier to adjust the portion.
For frozen meals, leave a little room in rigid containers because food can expand as it freezes. Label the contents and date before the container disappears into the freezer. “Mystery protein” is not an inventory system. Thaw frozen meals in the refrigerator rather than on the counter, and use them soon after thawing.
Leafy greens and delicate produce
Moisture is usually the enemy of leafy greens. Wash them if that fits your routine, then dry them thoroughly before storage. A salad spinner is useful, but a clean towel can also remove excess water. Store greens in a container or bag with enough room that they are not crushed, and use a paper towel to absorb residual moisture when appropriate.
Keep dressing, cooked ingredients, and salty toppings separate from greens until you are ready to eat. Salt and acid draw water from vegetables, which is excellent for a dressing and terrible for crisp lettuce several hours later.
Berries are better stored dry and washed close to eating. Inspect the container when you bring them home and remove damaged fruit, since one soft or moldy berry can affect the rest. Do not seal warm or damp produce in a way that traps condensation.
Heartier vegetables
Carrots, peppers, broccoli, cabbage, and similar vegetables are generally more forgiving than greens, but they still benefit from sensible storage. Cut only as much as you are likely to use. Keep vegetables dry when excess water will make them soft, and use a sealed container when they need protection from refrigerator air.
Some vegetables can be stored in water, but that is not a universal rule. Cut carrots may tolerate a water-filled container, while herbs, mushrooms, and leafy vegetables often need a different approach. The goal is not to apply one storage trick to everything. The goal is to match the storage environment to the produce.
Roasted vegetables often hold up better than raw cut vegetables in a prepared meal, but their texture changes over time. If crispness matters, store them separately from grains and sauces and reheat them on a sheet pan or in an air fryer rather than sealing them into a wet bowl.
Strategic Workflow for Safe and Efficient Weekly Prep
The order of operations matters more than the number of recipes. A reliable prep session reduces idle time, keeps raw and cooked foods separate, and gets finished portions into safe storage before you lose patience.
Start by checking the week rather than automatically cooking seven identical days. Count the meals you will actually eat at home, identify training days, and decide which portions belong in the refrigerator and which belong in the freezer. This small inventory prevents the common mistake of cooking for an imaginary schedule.
Then use a sequence that keeps the kitchen moving:
1. Clear and sanitize the workspace. Empty the sink, wash the cutting board, check that containers and lids are clean, and make space in the refrigerator before you turn on the oven.
2. Review the ingredients. Group raw proteins, produce, grains, sauces, and snacks. Check dates and condition. Do not build the week around food that already looks questionable.
3. Start the longest-cooking items. Roast root vegetables, bake proteins, or begin grains first. Use the oven and stovetop time to handle lower-effort tasks.
4. Prepare raw produce while food cooks. Wash and dry vegetables, chop what will keep well, and keep raw protein tools separate from ready-to-eat ingredients.
5. Cook in batches that can cool efficiently. A large pot of rice or a deep pan of meat takes longer to lose heat. Spread food into smaller, shallow portions instead of leaving it in one deep container.
6. Refrigerate cooked food promptly. Do not wait for a batch to sit on the counter until it reaches room temperature. Divide it, place it in the refrigerator, and allow cold air to circulate.
7. Portion according to the baseline. Weigh or measure the components you are tracking. Keep sauces and ingredients that lose texture separate when necessary.
8. Label every portion. Write the food and preparation date on the container. If several meals look similar, add the intended day or meal as well.
9. Freeze the later portions. Anything you do not expect to eat within the refrigerator window should go into the freezer while it is still fresh.
10. Clean before you finish. Wash raw-protein equipment separately and disinfect the surfaces that need it. A clean kitchen makes the next prep session much more likely.
The inventory itself can stay simple. Before shopping, note how many portions of protein, carbohydrates, vegetables, fruit, and snacks you already have. Then compare that list with the meals you plan to make. This weekly meal prep inventory checklist prevents duplicate purchases and exposes the real gaps: perhaps you have enough chicken but no containers, plenty of oats but no quick breakfast protein, or vegetables that will spoil before you can cook them.
A practical inventory might track:
- Prepared protein portions in the refrigerator
- Frozen meals and their dates
- Cooked grains, potatoes, or other carbohydrate sources
- Washed and unwashed produce
- Sauces, dressings, and toppings
- Portable snacks for work or training
- Clean containers with matching lids
- Available refrigerator and freezer space
You can also organize prep around interchangeable components rather than finished recipes. For example, cooked turkey, rice, roasted peppers, greens, and two sauces can become a bowl, a wrap, or a plate. This gives you variety without requiring a completely different recipe for every day. It also makes leftovers easier to use before they become a safety problem.
Do not ignore transport. A meal that is safe in the refrigerator can become unsafe in a warm gym bag or car. Use an insulated lunch bag and cold packs when food will not remain refrigerated. Pack sauces securely, keep containers upright, and choose meals that will still be enjoyable after reheating. A nutritionally perfect lunch that leaks through your bag is not a sustainable system.
The Verdict on Prep Setup
Skip the oversized “athlete meal prep kit” built around branded tongs, matching labels, and equipment that solves a problem you do not have. None of it matters if your refrigerator runs warm, your containers leak, your food stays on the counter too long, or you are portioning without knowing what the meals are meant to provide.
The useful fitness meal prep essentials are straightforward: a digital scale if you need portion consistency, containers suited to your food and transport routine, a refrigerator thermometer, reliable knives and pans, freezer storage, and a working understanding of time and temperature. Add the ingredients and recipes that fit your actual week, not the fantasy schedule used in social-media prep videos.
Start with the baseline. Gather only the tools that remove friction. Cook in portions that can cool safely, refrigerate them promptly in shallow containers, and freeze what you will not eat soon. Store produce according to its weaknesses instead of forcing every ingredient into the same box. Label everything.
Meal prep works when it supports the life you already have. The shortcuts that ignore nutrition, storage, and food safety are what fail.